Tags are flexible, customizable labels you can use to categorize and manage your contacts within Mailercloud. They allow you to construct your own contact structure based on specific information you have about your audience.
This guide will walk you through the basics of using tags in Mailercloud and show you how they can be used to effectively manage and organize your contacts.
Simply put, tags are unique identifiers that you create to organize your contacts. They can be based on any criteria of your choosing—such as customer interests, demographics, interaction with past campaigns, or any other data you have about your contacts. This allows you to create a personalized structure that best suits your business’s needs.
The primary benefit of using tags is that they allow for better organization and management of your contacts. With tags, you can:
Categorize contacts based on specific criteria
Personalize communications and increase engagement
Segment your audience for targeted marketing
You can create up to 20,000 tags for a single contact.
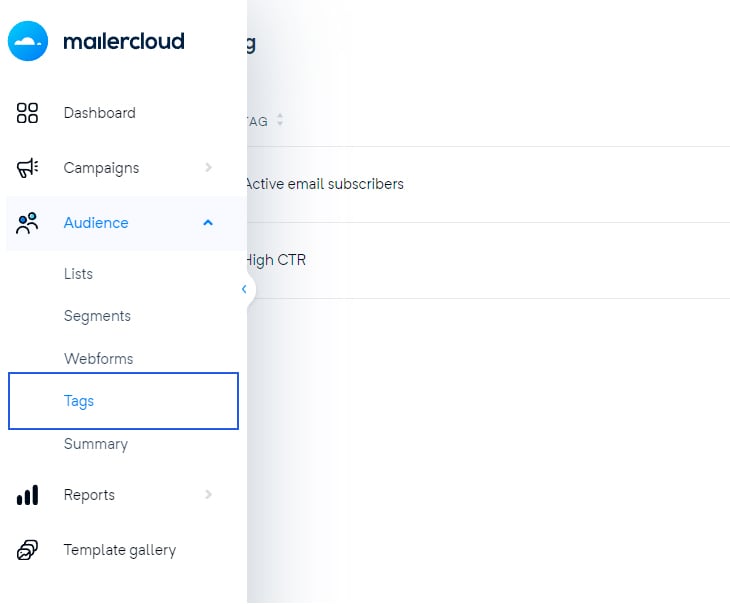
Click audience < Tags
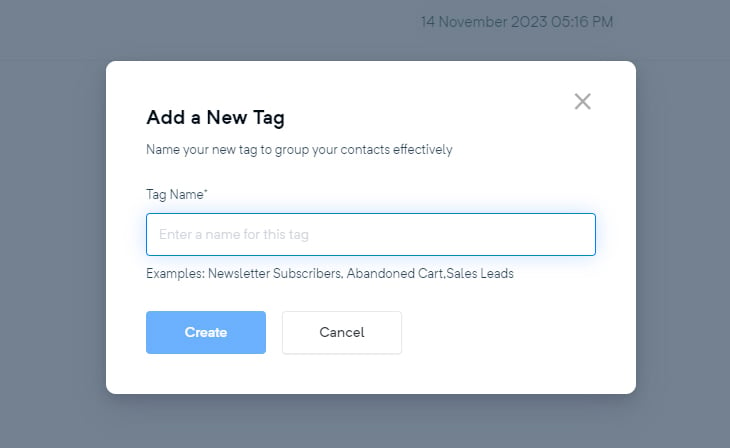
Click Create a new tag
Add tag name
Click Create
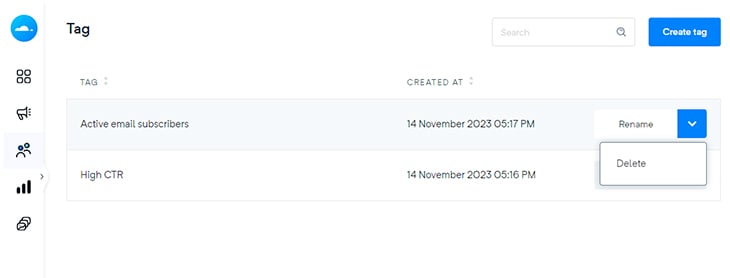
In the Mailercloud listing page, you have the option to manage your tags effectively. There are two main actions you can perform:
If you need to update a tag’s name for better clarification or due to changes in categorization, follow these steps:
Locate the tag you wish to rename on the listing page.
Click on ‘Rename’.
Enter the new name for the tag.
Confirm your change.
If a particular tag is no longer needed or relevant, you can remove it from your system. Here’s how:
Find the tag you want to delete on the listing page.
Click on ‘Delete’.
Confirm to remove the tag permanently.
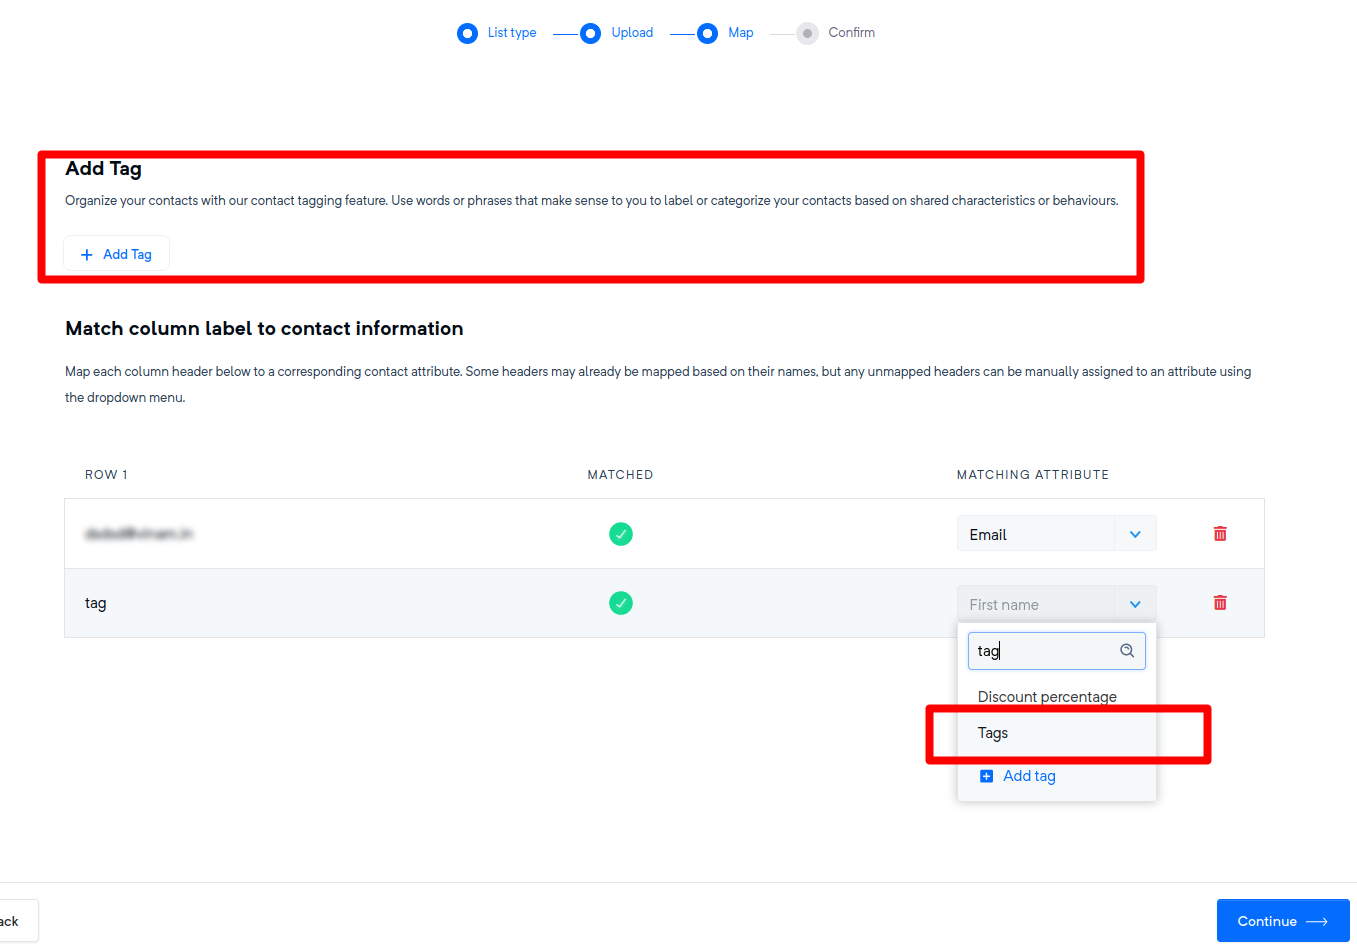
Mailercloud provides an efficient feature - “Add Tag Option” in the import and copy-paste mapping page. This option allows you to import tag data simultaneously while importing contacts using matching attributes.
Navigate to the import or copy-paste mapping page and look for the “Add Tag Option”.
Users have two options for mapping tags during the import process:
They can map tags common to all contacts from the top section of the import mapping page.
Alternatively, they can add the tags in their CSV files corresponding to each contact. In this case, each contact in the CSV file has different tags.
Continue with the import process. The selected or newly created tags will be assigned to the imported contacts based on the matching attributes.
While mapping, users can choose “tags” as the mapping field and add from the “add tag” section. However, only existing tags in the panel will be supported; any other tags will be skipped.
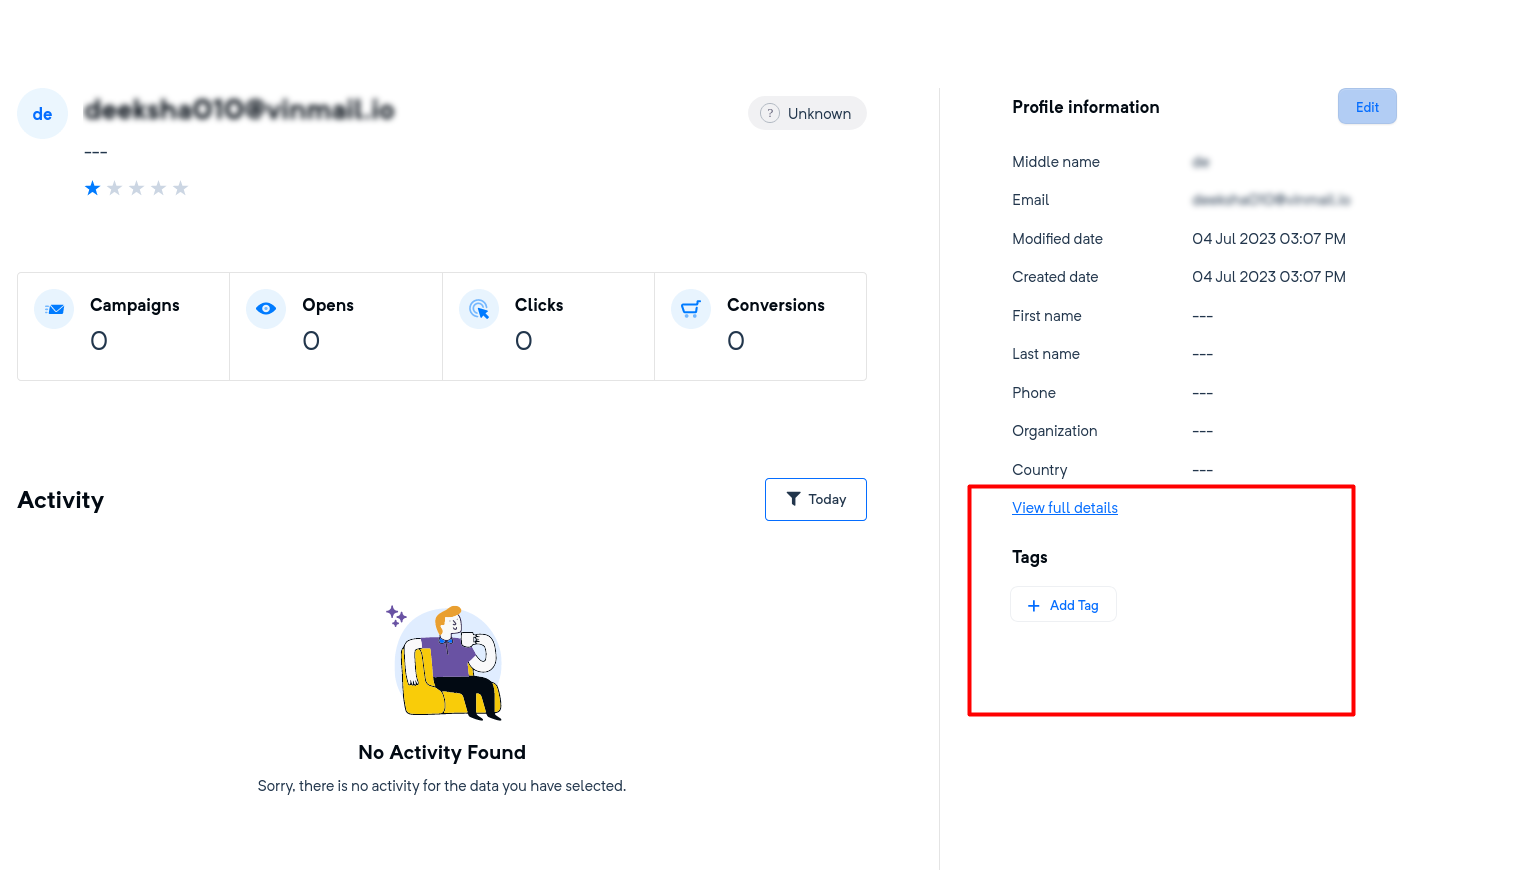
Mailercloud allows you to manage tags not only for your entire contact list but also for individual contacts. The “Add Tag” feature is available in both the ‘Add Single Contact’ and ‘Update Contact’ pages.
Navigate to the ‘Add Individual Contact’ page.
While entering the contact details, look for the “Add Tag” option.
Select from the existing tags or create a new one as needed.

Go to the ‘Contact’ page for the specific contact.
Locate the “ Tag” option.
Here, you can either add new tags to the contact or update the existing ones.
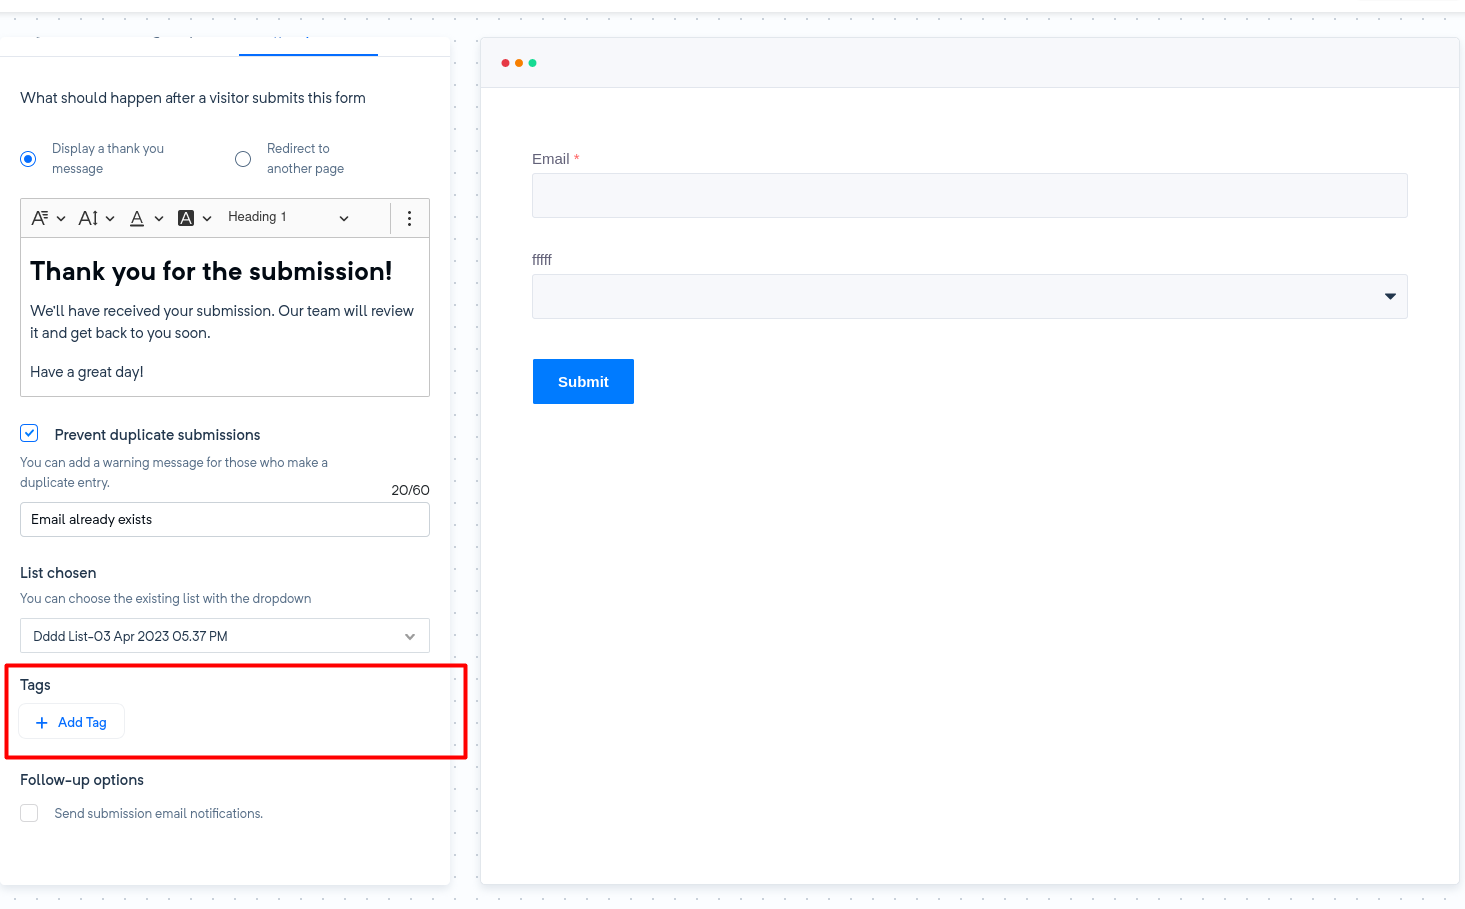
In Mailercloud, you can enhance the functionality of your webforms by adding a tag mapping option. This allows you to assign specific tags to contacts who fill out the form, helping you segment and manage your audience more effectively.
Navigate to the webform creation or editing page.
Look for the “Tag” option.
Select the tags you wish to assign to contacts who submit this form. You can choose from existing tags or create new ones as needed.
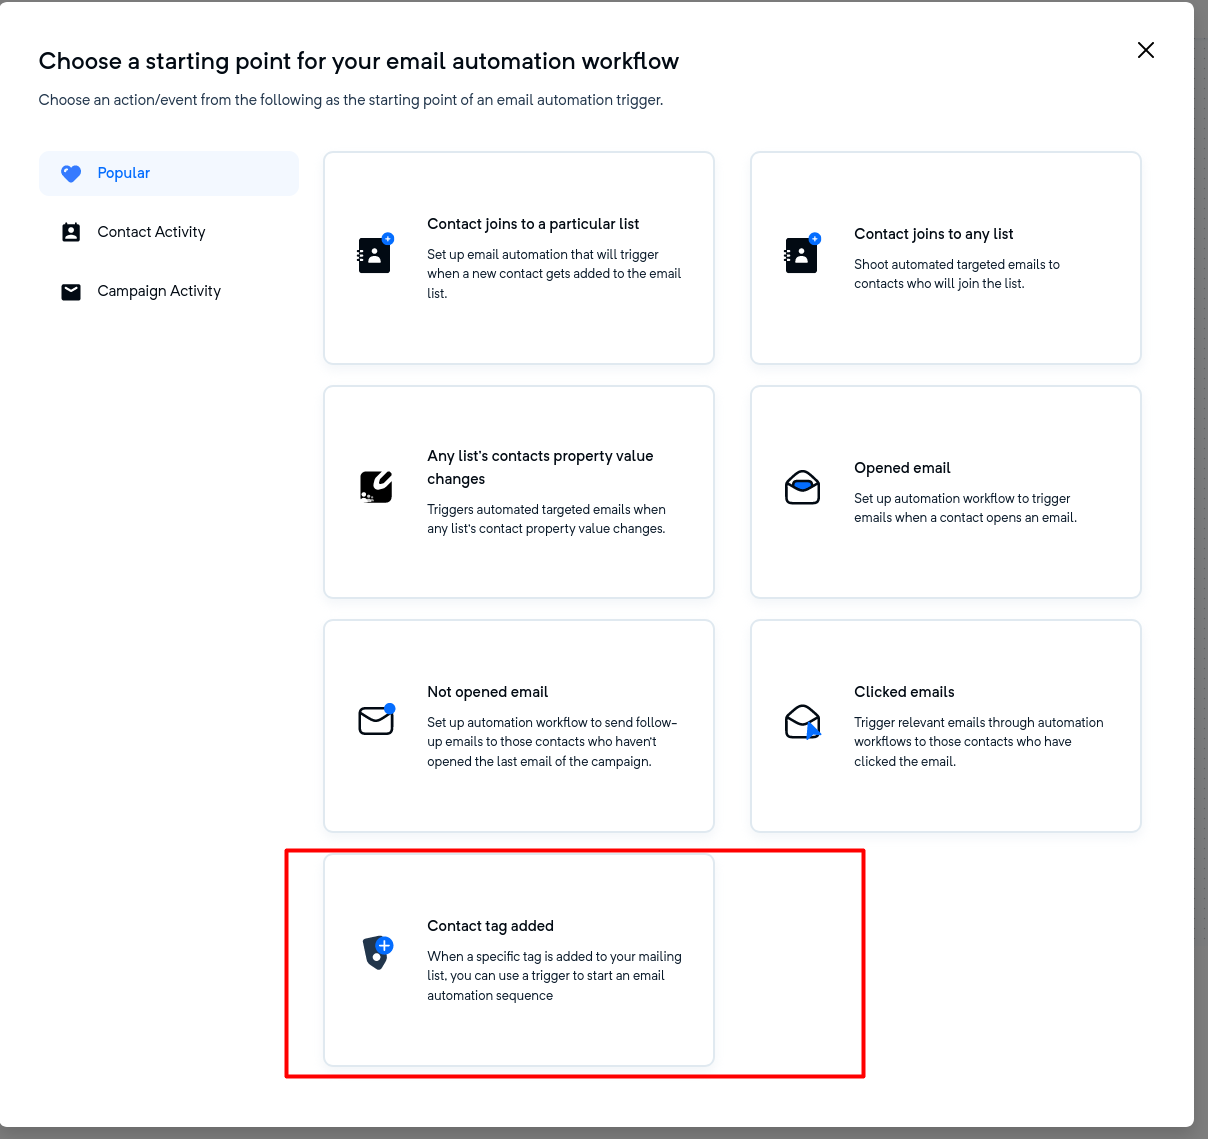
In Mailercloud, you can further optimize your automated workflows by adding a new initial trigger: “Contact Tag Added”. This trigger initiates a specific automation sequence when a tag is added to a contact.
Navigate to the Automation section.
Begin setting up a new automation or edit an existing one.
When asked to select an initial trigger, choose “Contact Tag Added” from the available options.
Configure the rest of your automation workflow as desired.
By implementing the “Contact Tag Added” trigger, you ensure that specific automations are instantly set in motion when certain tags are assigned to contacts, enabling a more personalized and timely interaction with your audience.
Mailercloud’s Advanced Automation allows you to add action triggers like “Add Tag” and “Remove Tag” to your automation workflows. These actions can be triggered based on various conditions or steps within your workflow.
In your automation workflow, select the point where you want to add the “Add Tag” action.
Choose “Add Tag” from the list of available action triggers.
Select or create the tag you wish to add to the contacts as they reach this point in the workflow.
Identify the point in your automation workflow where you wish to remove a tag.
Select “Remove Tag” from the list of action triggers.
Choose the tag you wish to remove from the contacts as they reach this stage in the workflow.
The “Add Tag” and “Remove Tag” action triggers offer dynamic ways to manage your tags during automated sequences, providing real-time adjustments based on your contacts’ interactions with your campaigns.

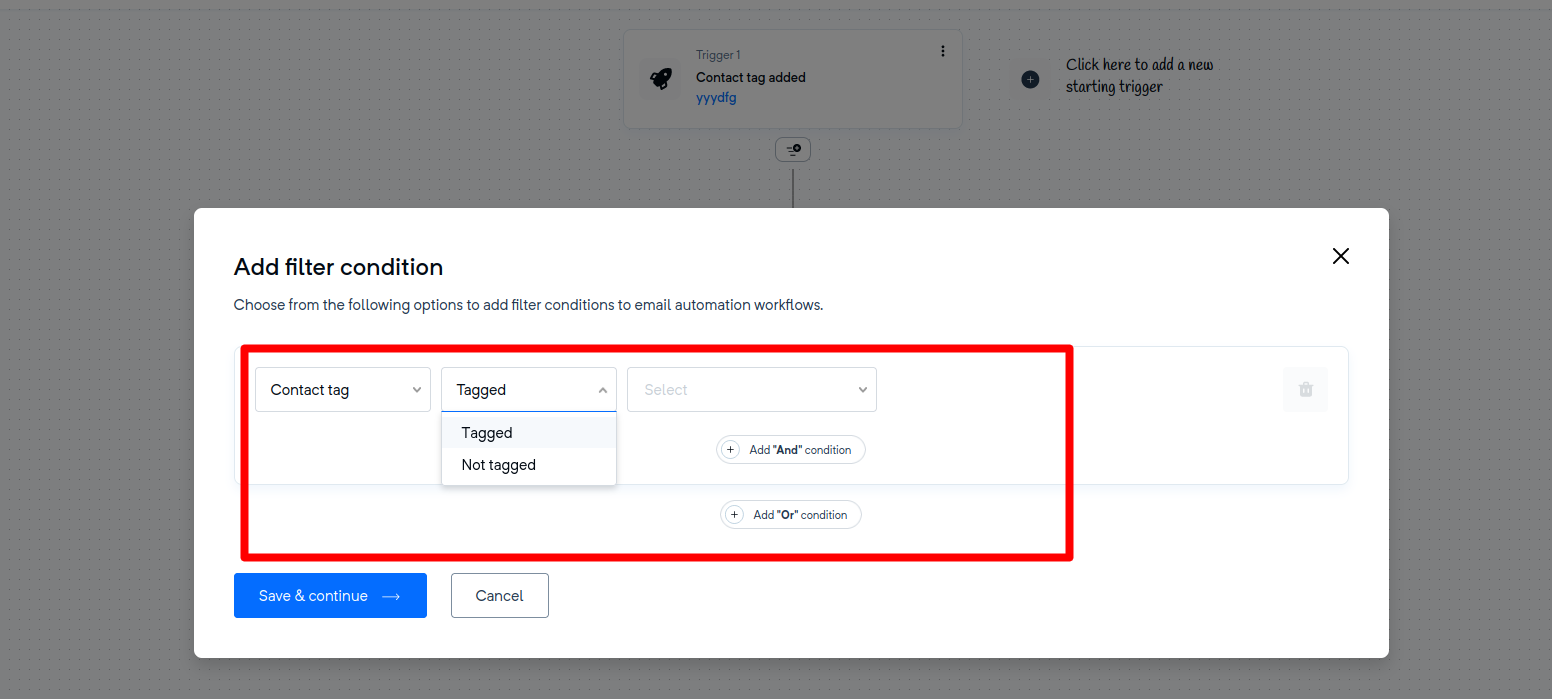
Mailercloud allows for precise audience segmentation by offering “Tagged” and “Not Tagged” conditions in contact tag filters. This feature lets you filter contacts based on whether they have been assigned specific tags or not.
Go to the area where you want to apply a filter in automation workflow.
Select the “Add Filter” option.
Choose “Contact Tag” from the list of filter conditions.
Select “Tagged” and select the tag(s) you want to use for this condition.
This will filter out all the contacts that have been assigned the specified tag(s).
Follow the same initial steps as above.
When specifying the condition, this time choose “Not Tagged” and enter the tag(s) you’re considering.
This will filter out all the contacts that have not been assigned the specified tag(s).
By utilizing these filter conditions, you can ensure your campaigns or automations are reaching the right audience segments based on their tag assignments.
You can create audience segments using “Tagged” and “Not Tagged” conditions, enabling you to define segments based on whether contacts have been assigned specific tags or not.
Navigate to the ‘Segments’ section.
Click on ‘Create Segment’.
Select “Contact Tag” from the list of conditions.
Choose “Tagged” and specify the tag(s) to be included in this segment.
This will create a segment comprising all the contacts that are assigned the specified tag(s).
Follow the same initial steps as above.
When specifying the condition, select “Not Tagged” and input the tag(s) under consideration.
This will create a segment including all the contacts that have not been assigned the specified tag(s).
By crafting segments using these conditions, you can target your campaigns more accurately, ensuring the right contacts receive your messages based on their tag assignments.
Tags in Mailercloud are a feature that helps you categorize and manage your contacts more efficiently.
Using tags facilitates the process of segmenting your audience, managing contacts, and creating personalized marketing campaigns.
Yes, Mailercloud provides an “Add Tag Option” during the import and copy-paste mapping process. This allows you to simultaneously import tag data while importing contacts.
Yes, you can enhance the functionality of your webforms by adding a tag mapping option in Mailercloud. This allows you to assign specific tags to contacts who fill out the form.
These are action triggers that can be added to your automation workflows in Mailercloud. They can be triggered based on various conditions or steps within your workflow.
Yes, in Mailercloud, you can define segments based on whether contacts have been assigned specific tags or not.