A brand kit is your brand, saved once. Store your logo, colours, fonts, social links and footer details in one place, and Mailercloud applies them to your emails, webforms and subscriber pages — so you don't set them up again for every campaign. You can type everything in yourself, or let Mailercloud read your website and build the kit for you.
Logo — one logo, used everywhere your brand is applied.
Colours — between 1 and 10, each with a role (primary, accent, text, background or extra) so Mailercloud knows which one belongs on a button and which on body text.
Fonts — a heading font and a body font.
Social links — Facebook, Instagram, X (Twitter), YouTube, LinkedIn, Pinterest and TikTok.
Footer details — company name, postal address and the permission reminder shown in your emails.
Email format — Branded (logo at the top, full footer with social links) or Minimal.
The quickest way is to let Mailercloud read your site. If you have no kits yet, you'll land straight on the setup screen.
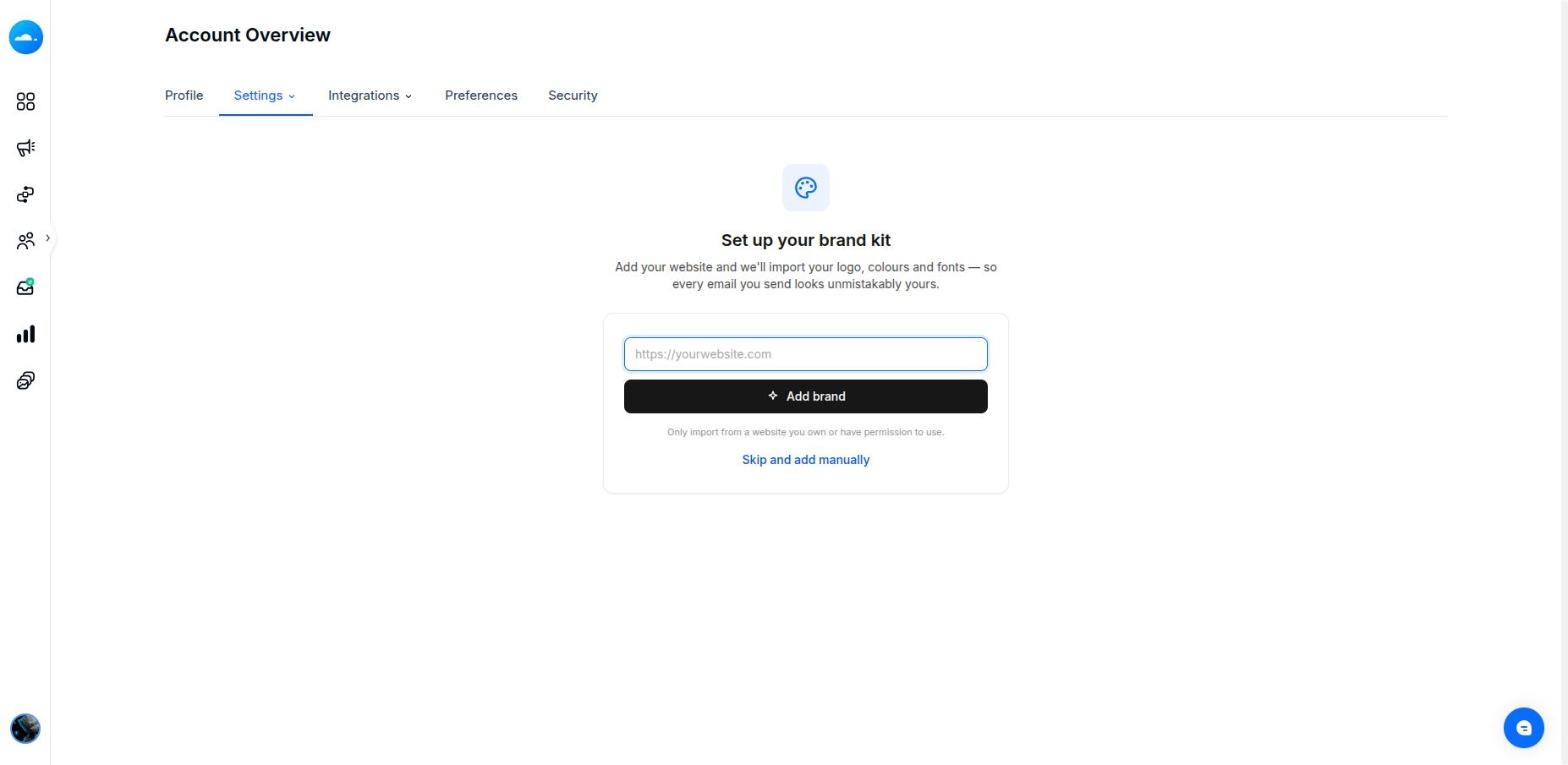
Step 1 — Type your website address and click Add brand.
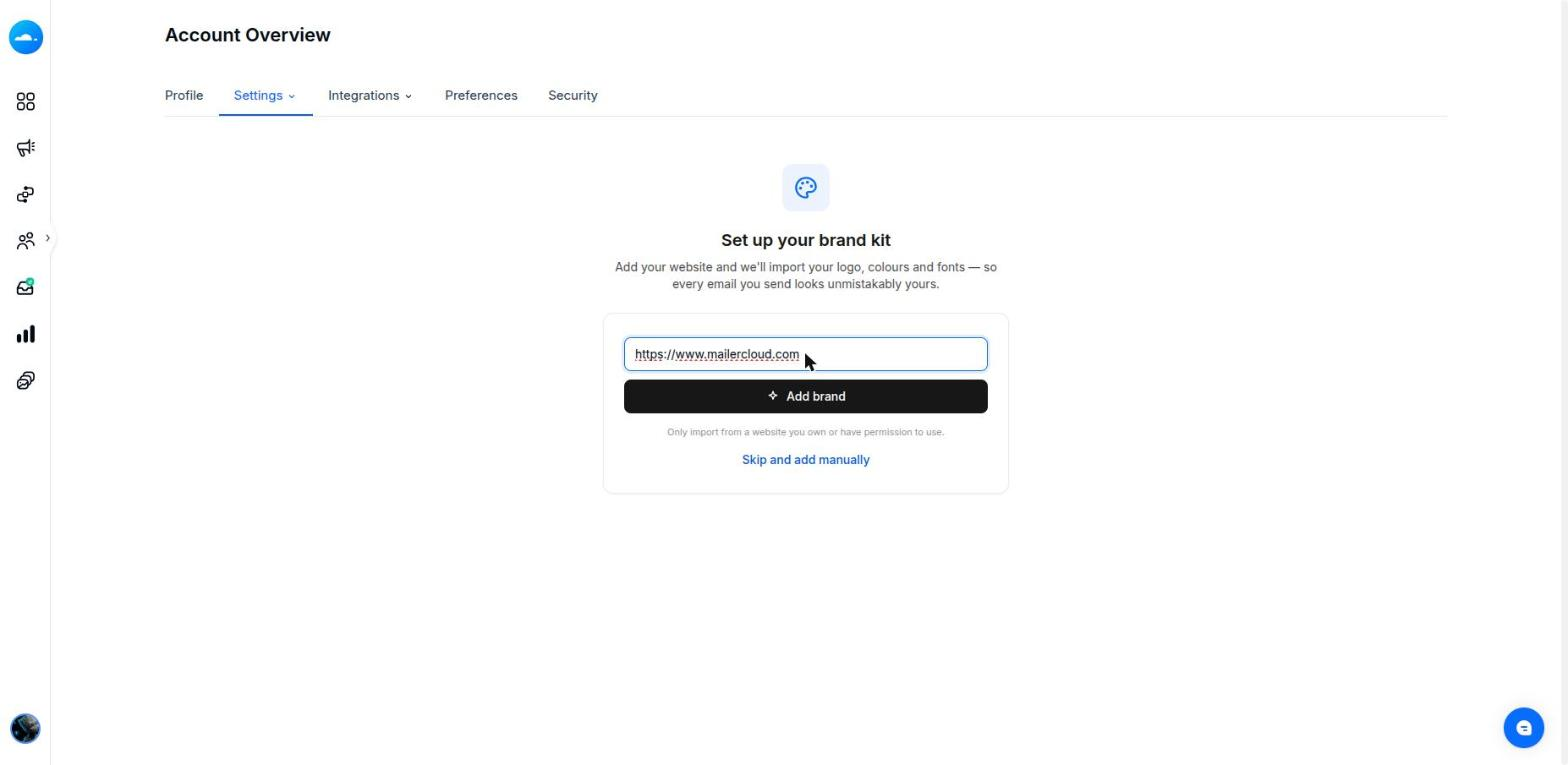
Step 2 — Mailercloud opens your site and looks for your logo, the colours your pages actually use, your heading and body fonts, links to your social profiles, and your postal address if it's published.
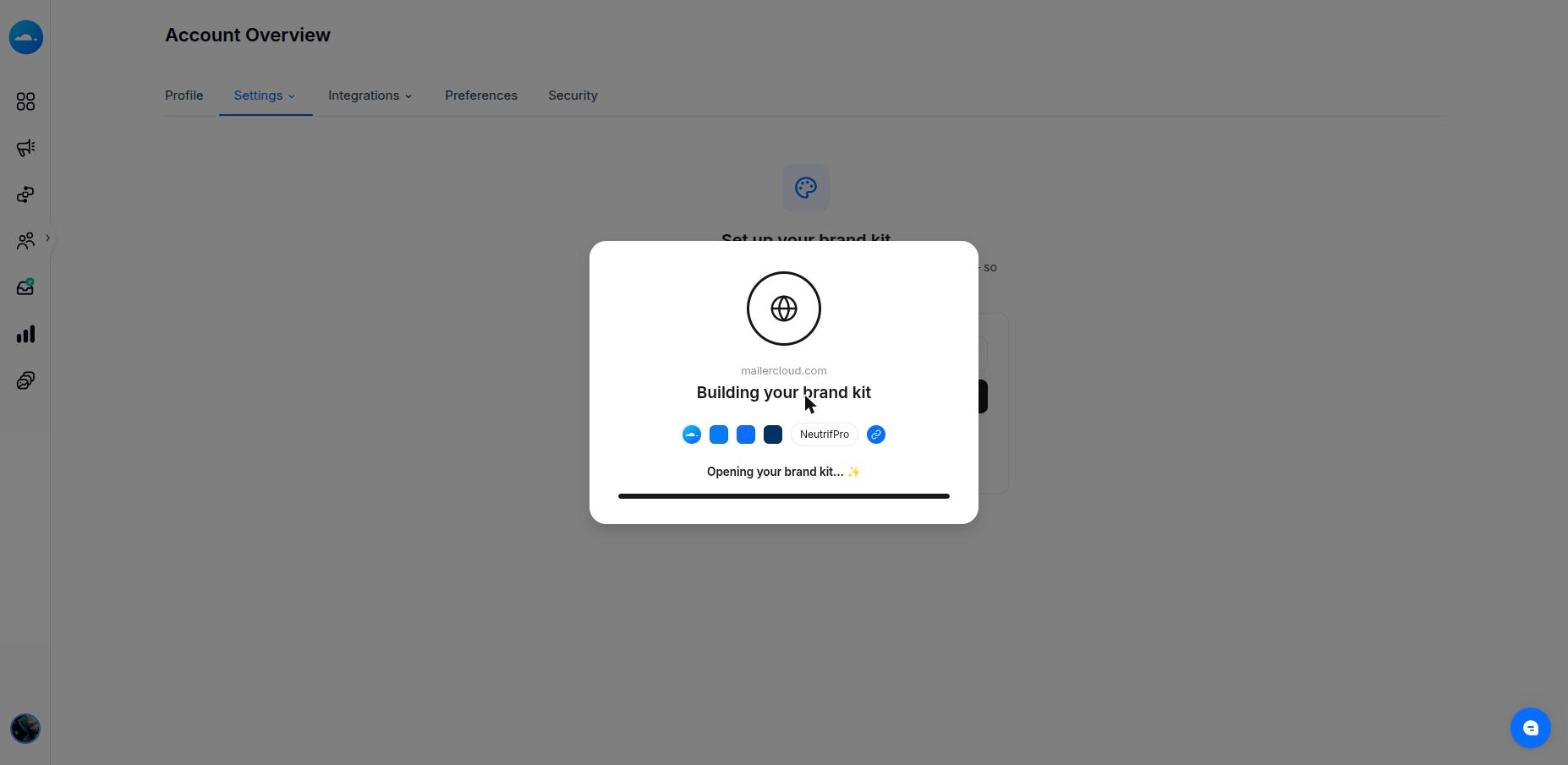
Step 3 — After a few seconds the kit opens so you can check everything and change anything that isn't right.
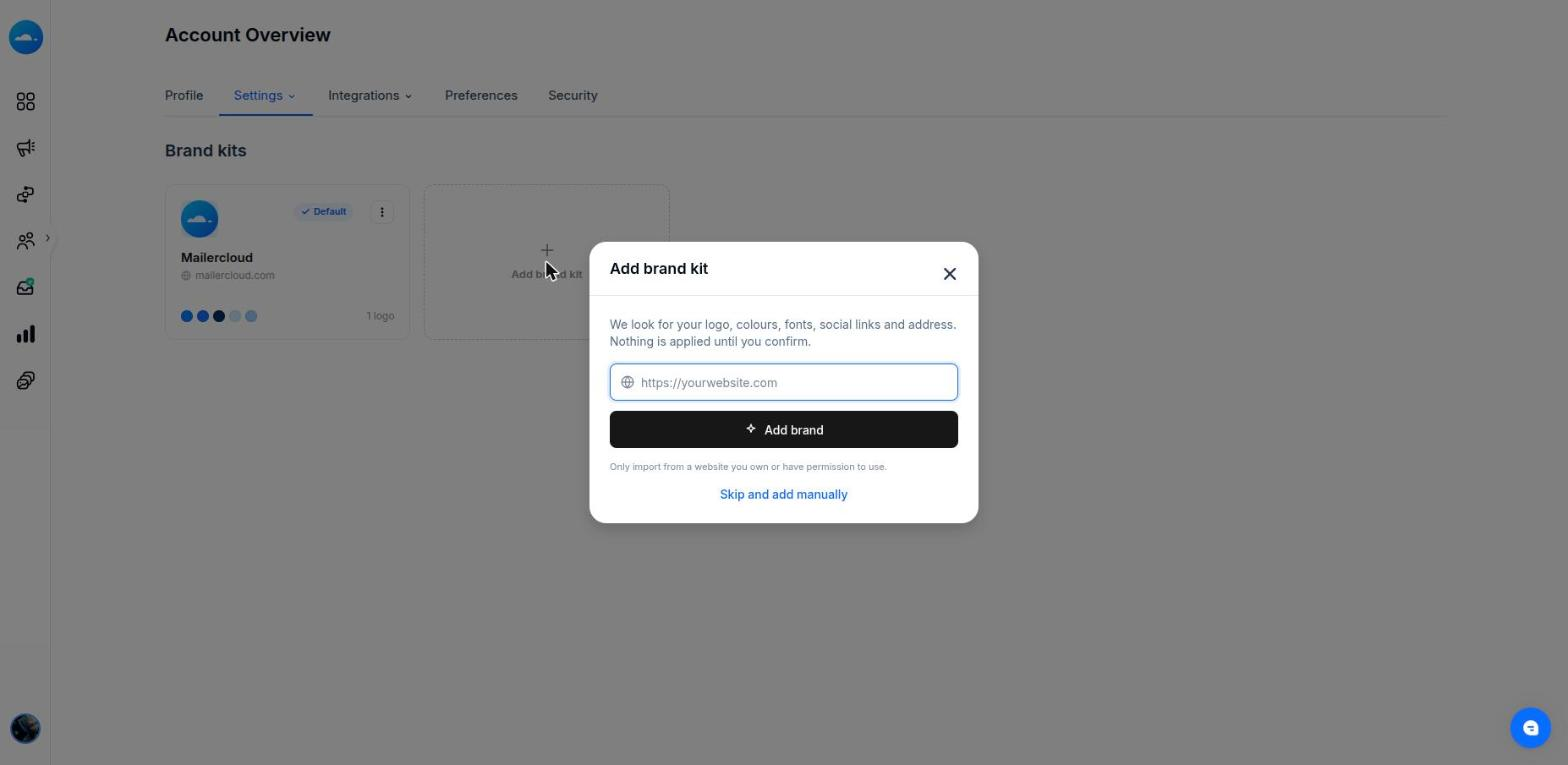
If you already have a kit, use the Add brand kit tile on the brand kit page instead. The dialog is the same.
Entering something like talk.yourcompany.com or blog.yourcompany.com reads yourcompany.com instead — your brand usually lives on your main site, not on a forum or blog. If the main site doesn't answer, Mailercloud falls back to the address you typed.
Sites hosted on a builder — yourname.wordpress.com, yourname.substack.com, yourshop.myshopify.com and similar — are read as they are, because there the subdomain is your site.
Click Skip and add manually on the same dialog to get an empty kit to fill in. You can also scan a site later and edit from there. A kit needs a name and at least one colour before it can be saved.
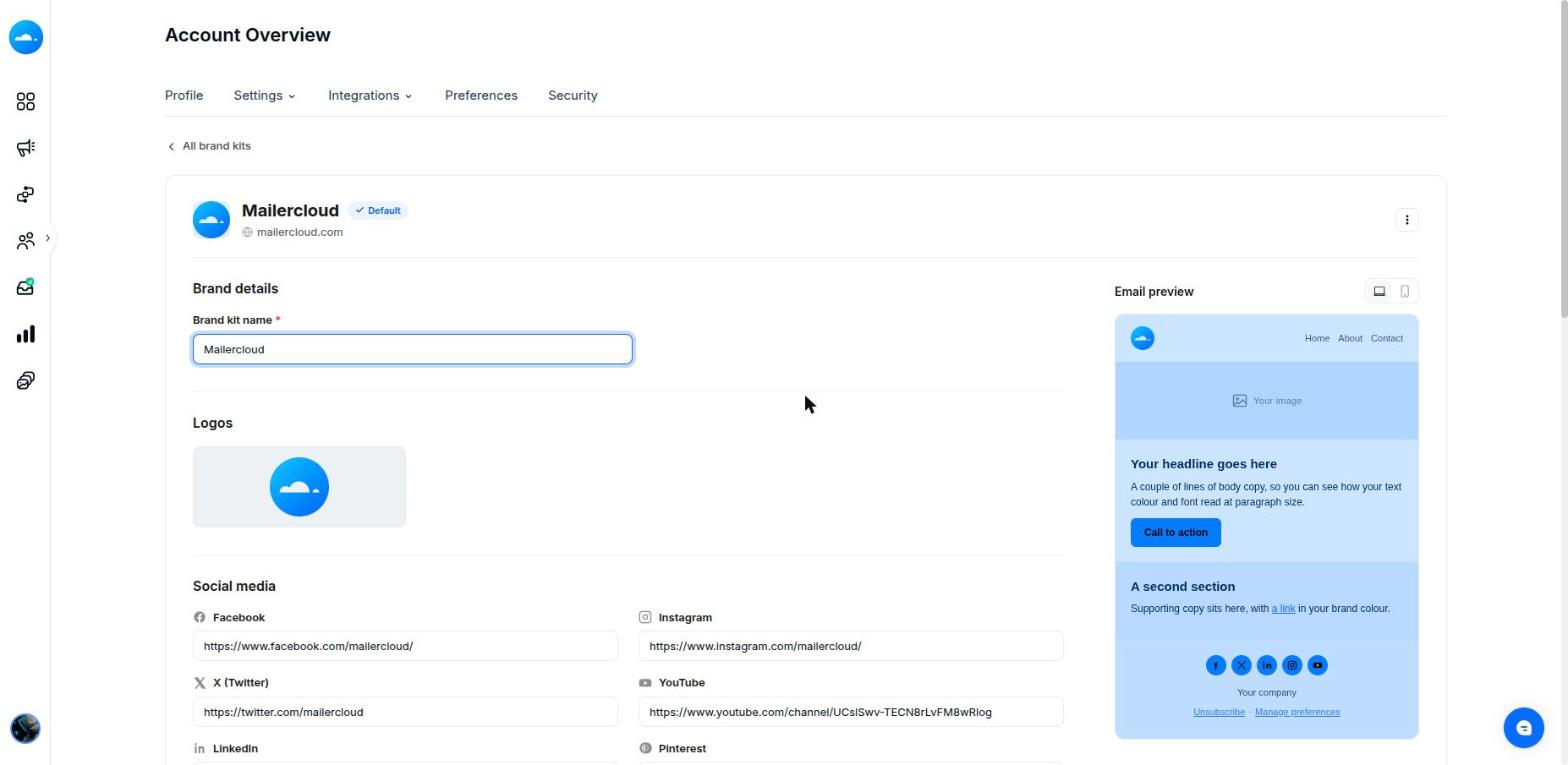
1. Brand details — The kit's name, and the website it came from.
2. Logos — Upload your logo, or replace the one Mailercloud found. Use JPG, PNG or GIF — these display reliably in every email client. SVG isn't supported because Outlook won't render it. A WebP logo found on your site is converted to PNG automatically.
3. Social media — Paste the full address of each profile. Leave blank any you don't use.
4. Styling, colours and fonts — Choose Branded or Minimal as the email format, then set your palette and typefaces. Each colour has a role, and Mailercloud checks contrast and warns if text on a colour would be hard to read.
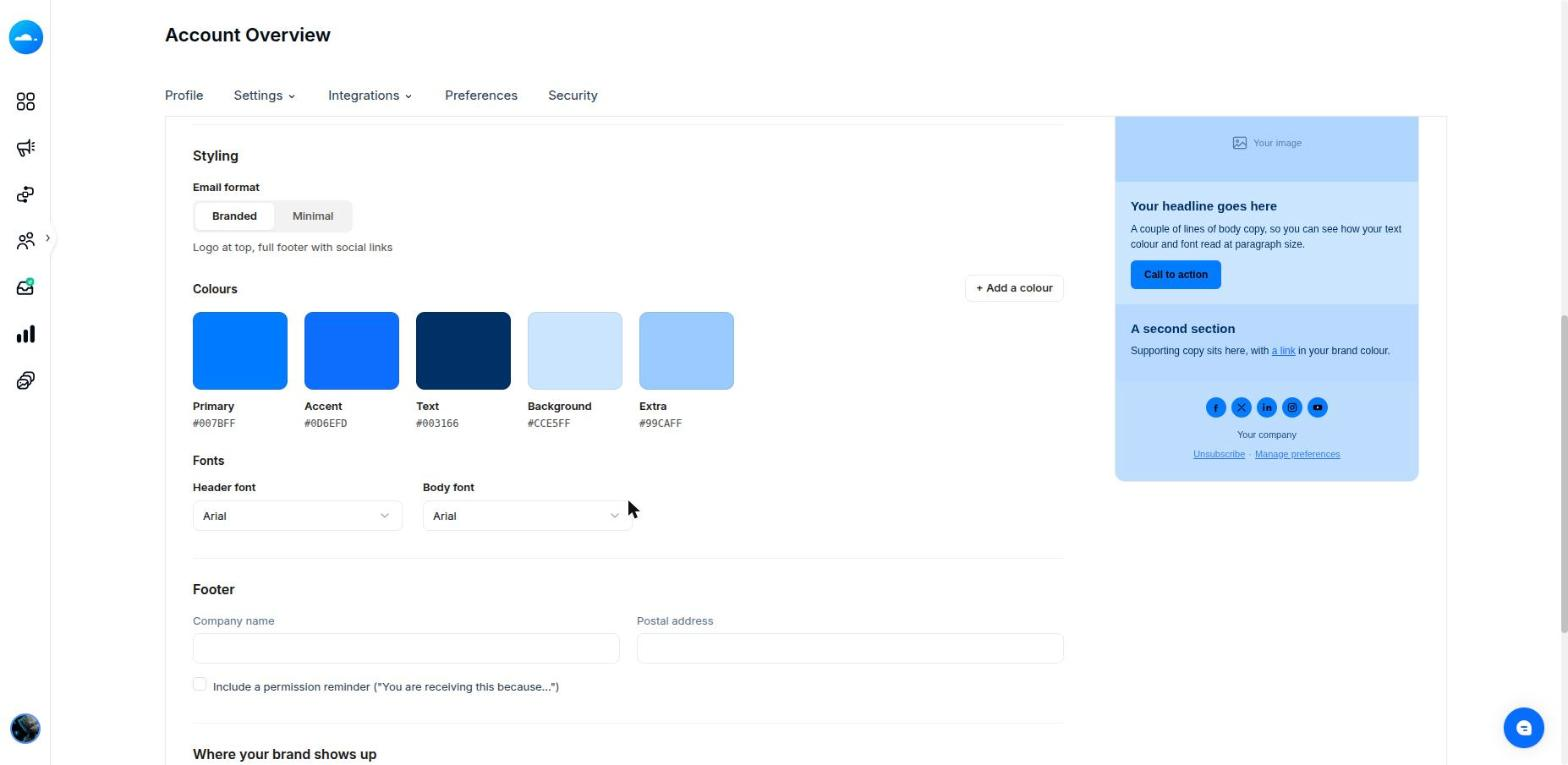
5. Footer — Company name and postal address, plus an optional permission reminder. Many countries require a postal address in marketing email, so it's worth filling in.
6. Email preview — Updates on the right as you edit, and switches between desktop and mobile.
Open Where your brand shows up on your default kit to choose where the branding is applied automatically, then click Save changes.
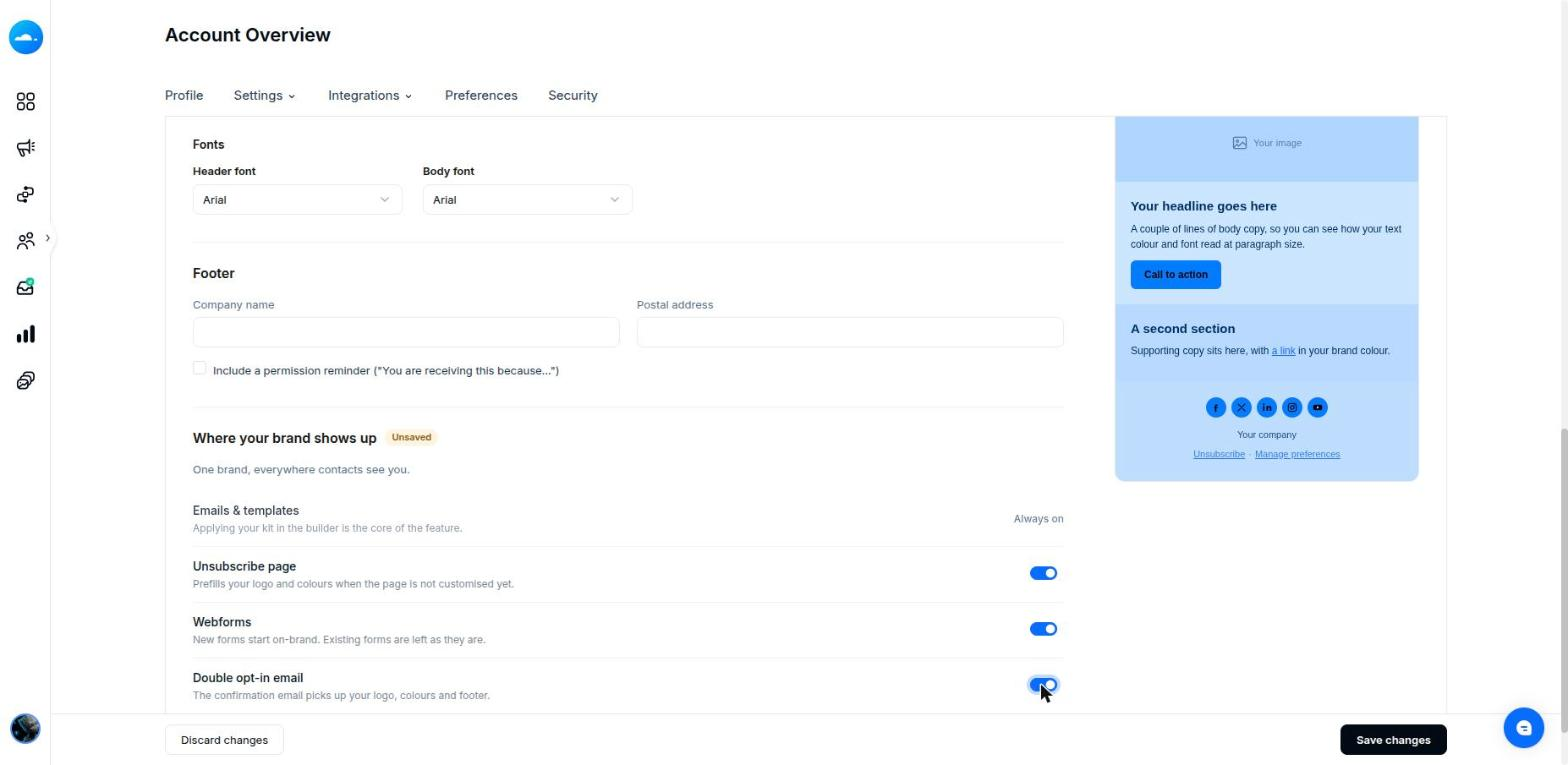
Emails & templates is always on — that's the core of the feature. The other three are yours to switch on:
Unsubscribe page — prefills your logo and colours when the page isn't customised yet.
Webforms — new forms start on-brand; existing forms are left as they are.
Double opt-in email — the confirmation email picks up your logo, colours and footer.
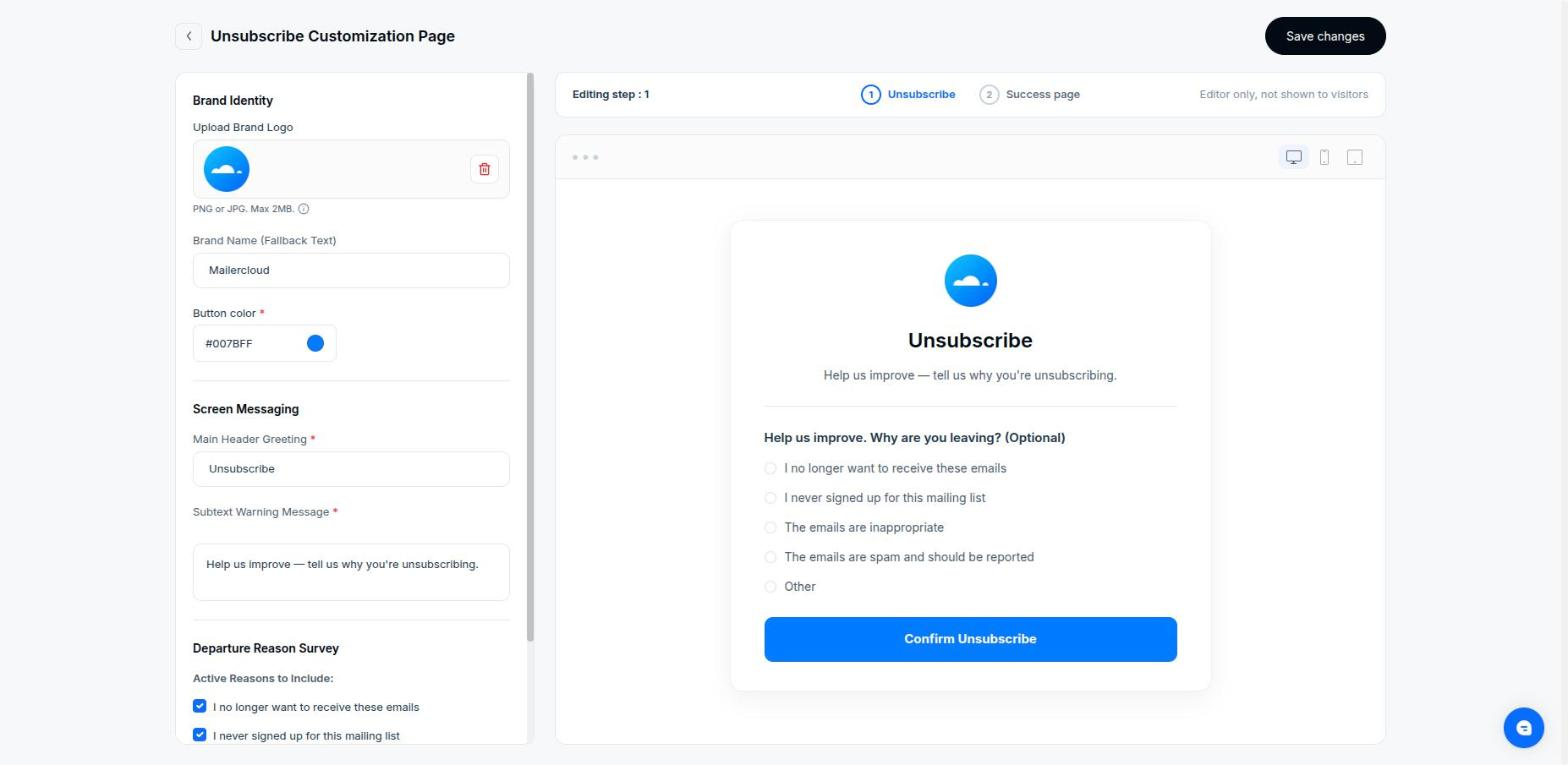
With Unsubscribe page on, the page picks up your logo, brand name and primary colour on the button. Open Account › Settings › Unsubscribe page to see it and edit any wording.
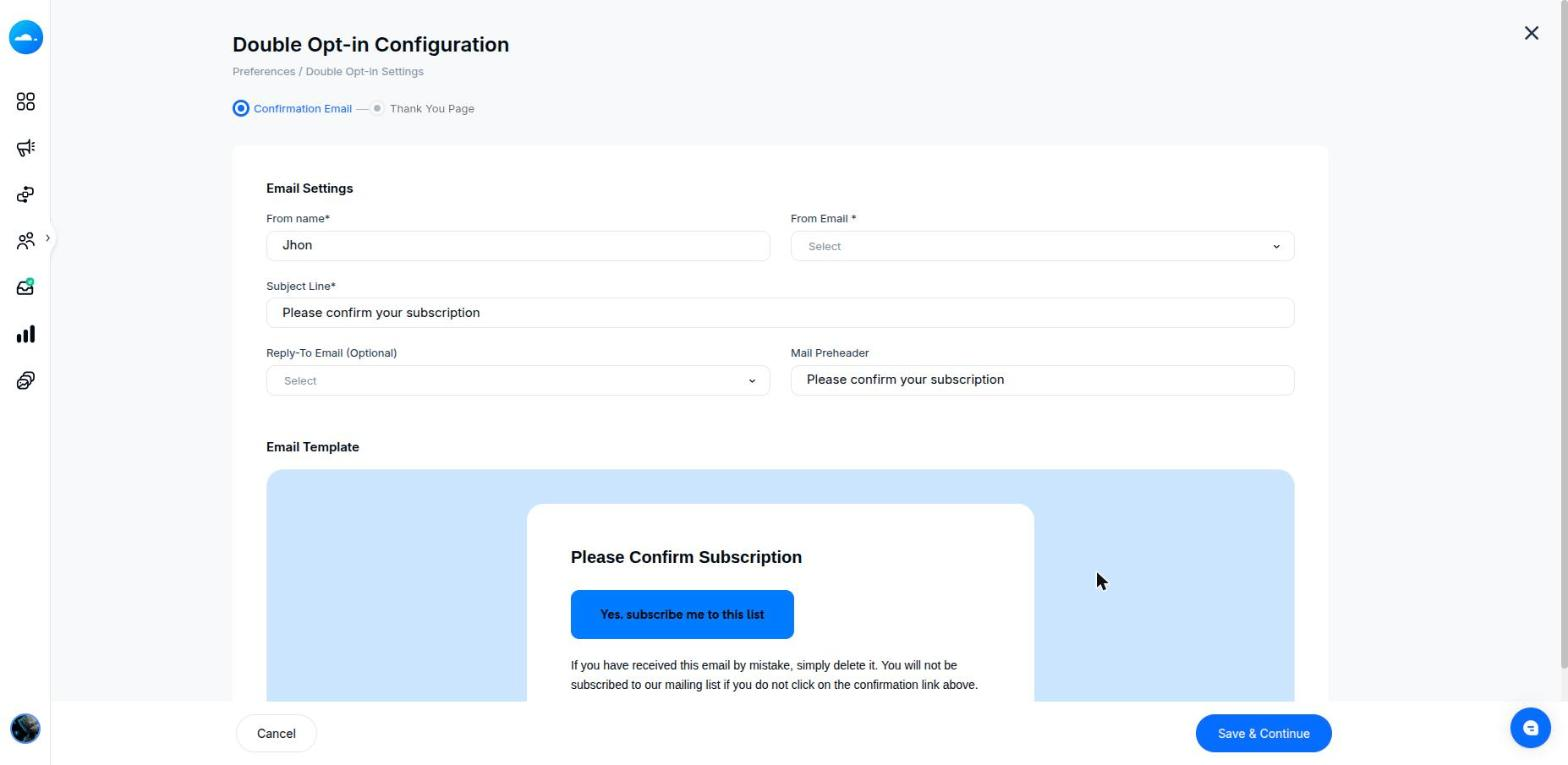
With Double opt-in email on, the confirmation email new subscribers receive picks up your colours and footer. Find it under Account › Preferences › Double Opt-in Settings › Configure Settings, where you can also set the from name, subject line and thank-you page.
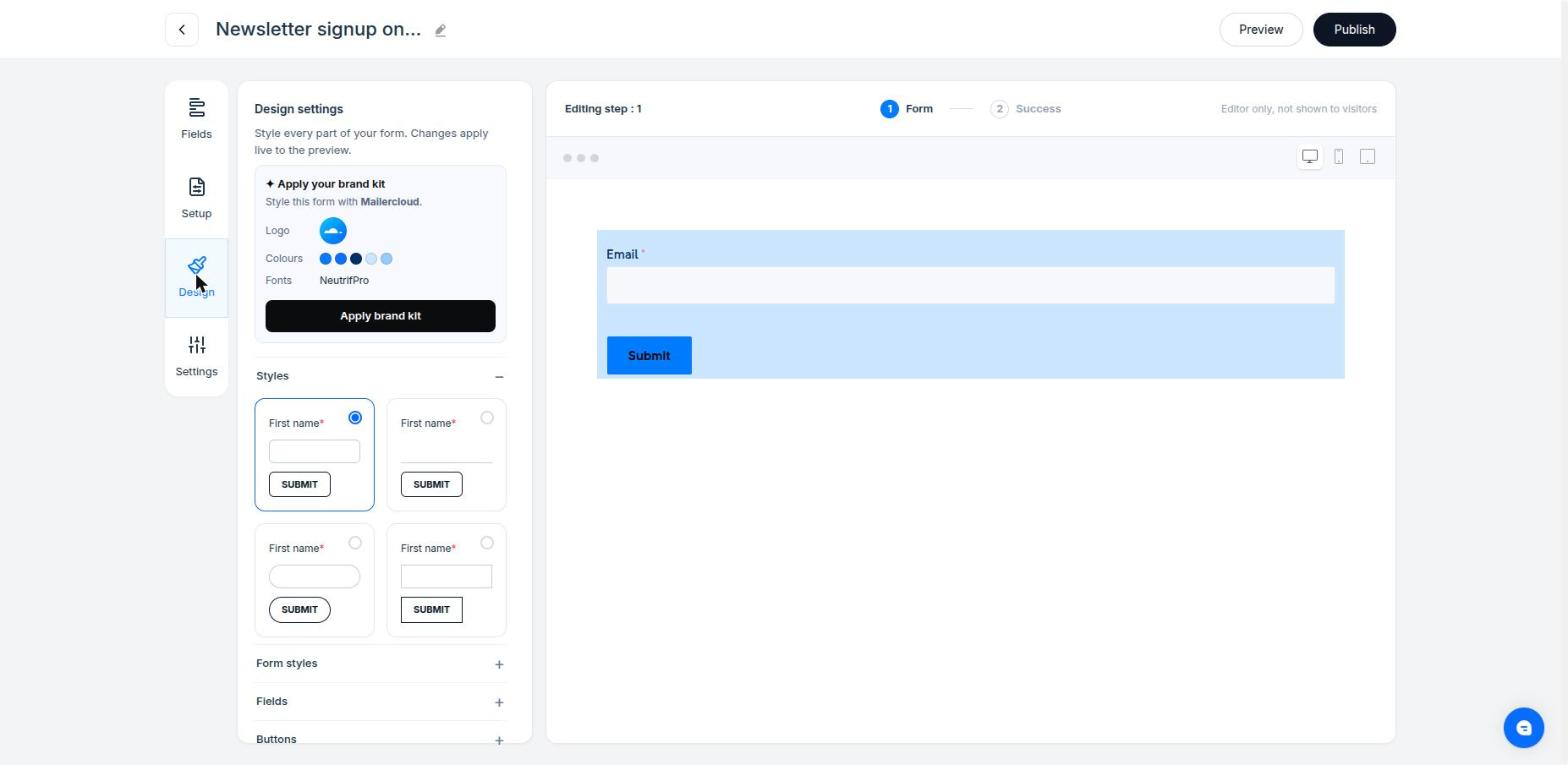
With Webforms on, every form you create from then on starts in your brand's colours and fonts. Forms you built earlier keep the styling you gave them.
Webforms also have a button: the Design tab of the form builder carries an Apply your brand kit card, so you can put your brand onto an older form whenever you want.
Start a new email from a layout or theme and it opens already branded — your logo at the top, your colours and fonts through the design.
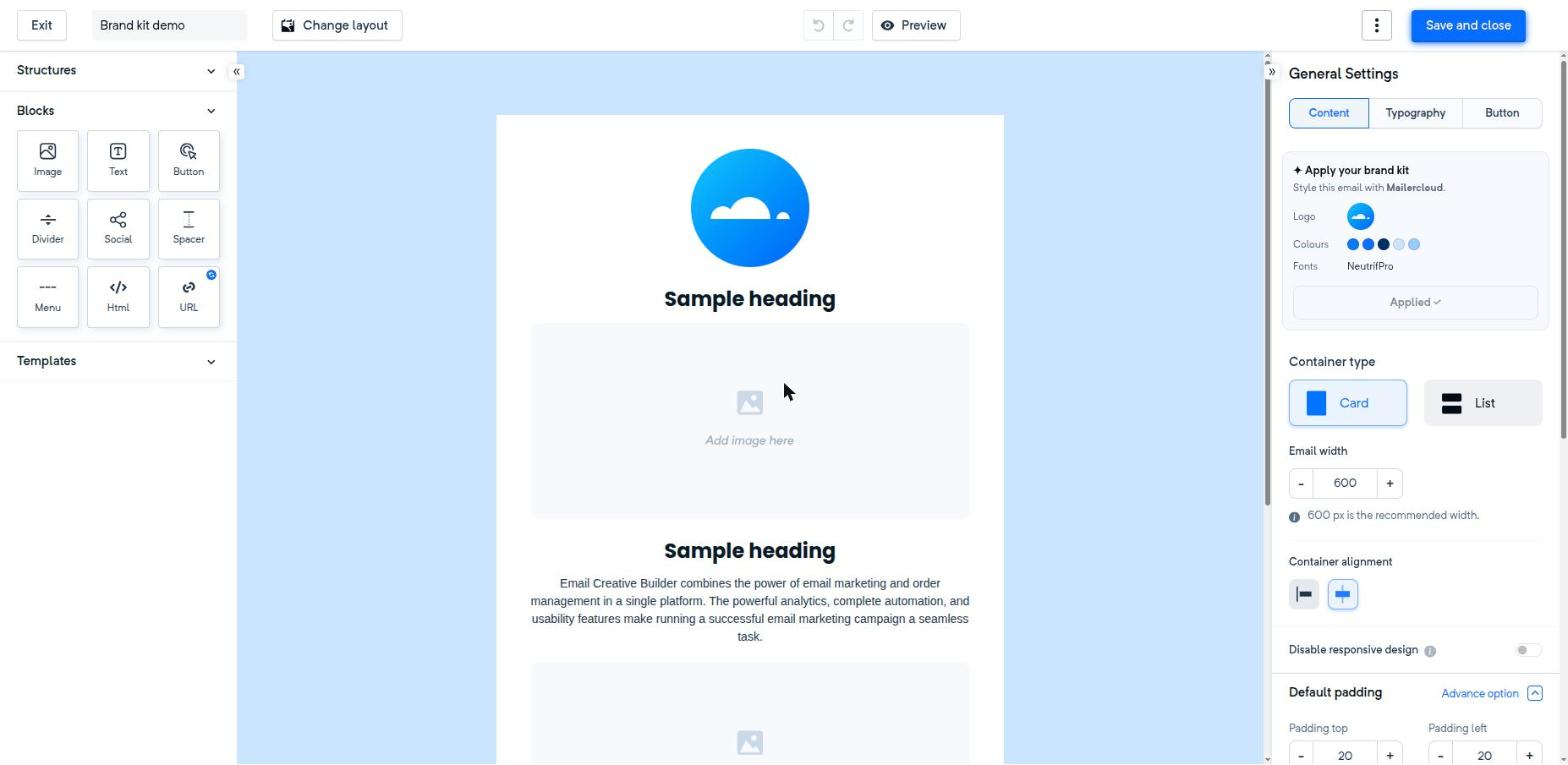
Inside the builder, the Apply your brand kit card in the right-hand panel shows which kit is in use and what it contains. If an email isn't branded yet, click Apply brand kit; once applied, the card says Applied ✓.
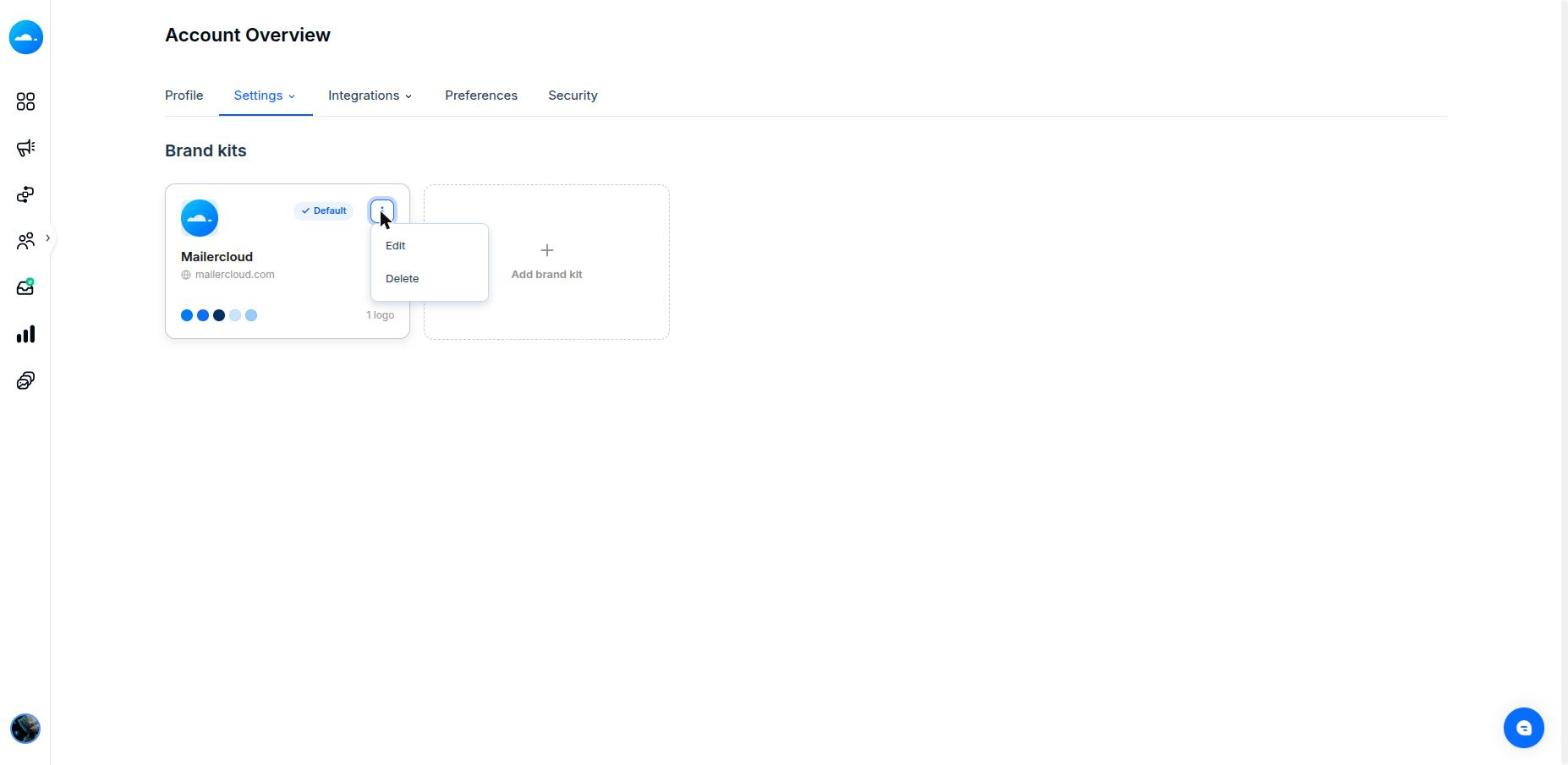
One kit is marked Default. It's the kit every automatic path uses — the builder, the unsubscribe page, webforms and the double opt-in email all read the default kit.
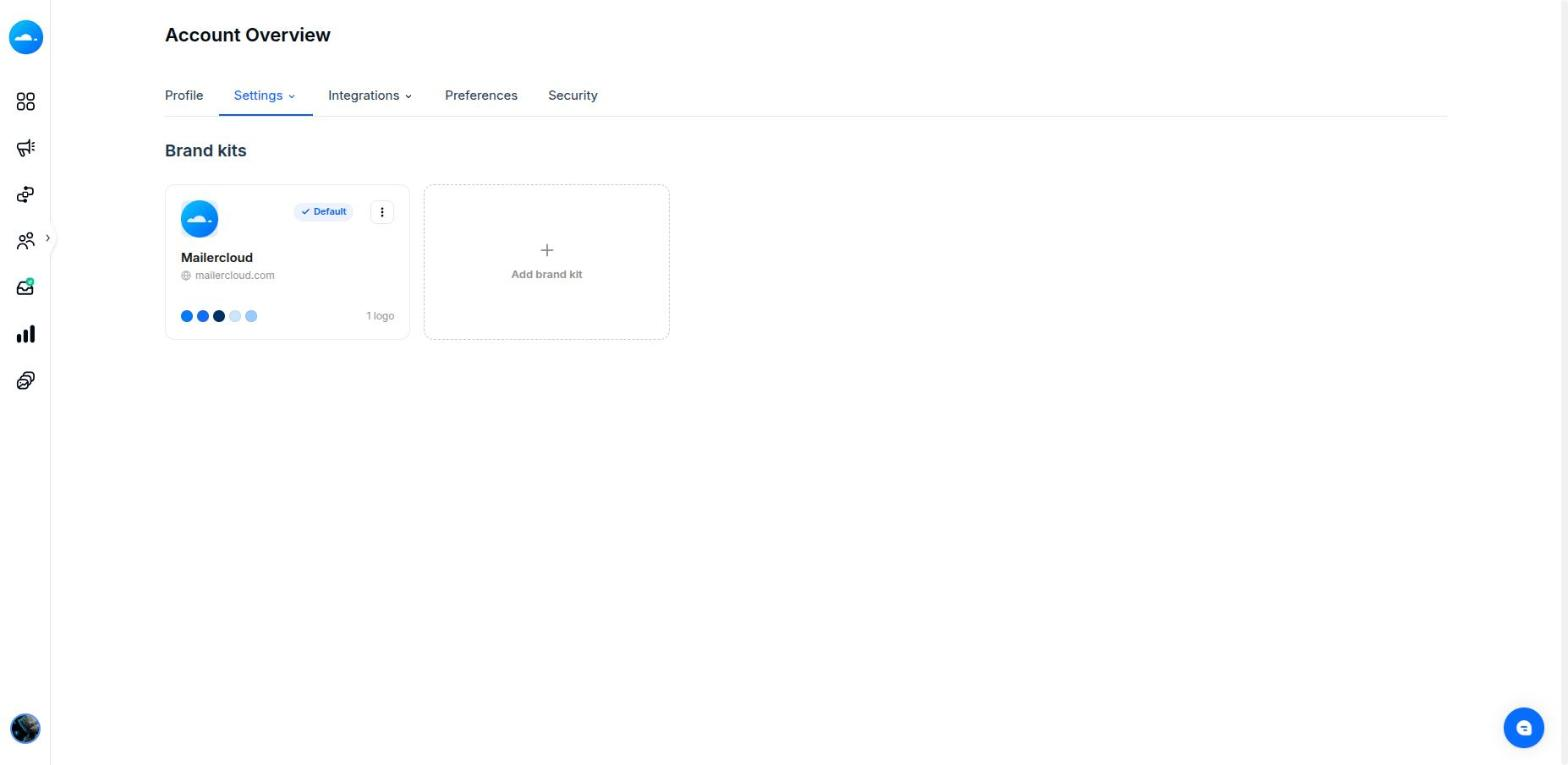
To change which one that is, open the ⋮ menu on a kit and choose Set as default. The option appears on any kit that isn't already the default.
If you gave us your website address when you signed up, Mailercloud may have built a kit from it in the background. You'll see Review your brand kit on your dashboard, and the kit shows "We built this from your website."
A kit built this way does nothing until you accept it. Check the logo, colours and fonts, change anything that looks off, then click Use this brand kit.
Some websites block automated visitors, including ours. You'll see "that website didn't respond normally — you can set up your brand manually." This isn't a problem with your site or your account — those sites simply refuse anything that isn't a person in a browser. You have two options:
Try your main domain rather than a subdomain or a deep page.
Set up the kit by hand. Everything the scan would have filled in can be entered directly in a couple of minutes.
You can scan a site again at any time later.
Brand kits per account · 5
Colours per kit · 1–10
Social networks · 7 (Facebook, Instagram, X, YouTube, LinkedIn, Pinterest, TikTok)
Logo formats you can upload · JPG, PNG, GIF (WebP found on your site is converted; SVG not supported)
Website scans · one every few seconds per account
Logos you upload — or that we find on your site — are stored on Mailercloud's own servers, so your images keep working in emails even if your website changes.
Do I have to scan my website?
No. Every field can be filled in by hand, and you can edit anything a scan found.
Does scanning my site change anything on it?
No. Mailercloud only reads your public pages, exactly as a visitor would. It never changes your site.
Why didn't it find my logo?
Either your site doesn't publish one where we look, or it's in a format we can't use in email — SVG is the common case. Upload it manually and everything else the scan found is kept.
Why are the colours not quite right?
We pick the colours your pages actually use most, which isn't always the palette in your brand guidelines. Edit any colour, or remove one and add your own.
The font in my kit isn't the font on my website.
We keep the name of the font we found, but emails have to use a typeface that mail apps can render. Your kit shows the closest email-safe match, and that's what recipients see.
Can I have a different brand kit for different campaigns?
You can keep up to five kits, but Mailercloud always applies the default one. To build with a different kit, set that kit as the default first.
What happens to my emails if I change a kit?
Campaigns you've already sent don't change, and emails you've already built keep the styling you gave them. A kit applies when it's used.
Can I delete a brand kit?
Yes, from the kit's ⋮ menu, or from the menu at the top of the kit itself. If you delete the default, set another kit as default afterwards so your subscriber pages keep their branding.
If you have any questions about brand kits, reach out to our support team via live chat or email us at [email protected] — we're happy to help.
Happy emailing! 🚀