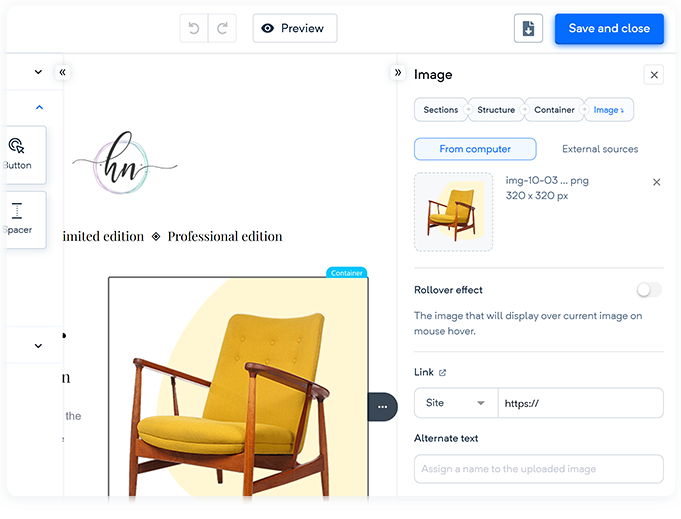
Uploading an image is easy. You can upload an image from your device or retrieve it from an external source. However, you should ensure that the image size does not exceed 3 MB or 4000X4000 Px. Also, it is recommended to keep the uploaded image colour the same as the background colour. It is because the background image may not support some email clients like Windows Outlook 2007 – 2019, Windows 10 Mail, Android 4.4, Gmail app on iOS & Android with a non-Gmail account when used with a different background colour.
You can upload an image which can be in formats like PNG, JPG or GIF with size up to 3 MB or 4000 X4000 px, as shown
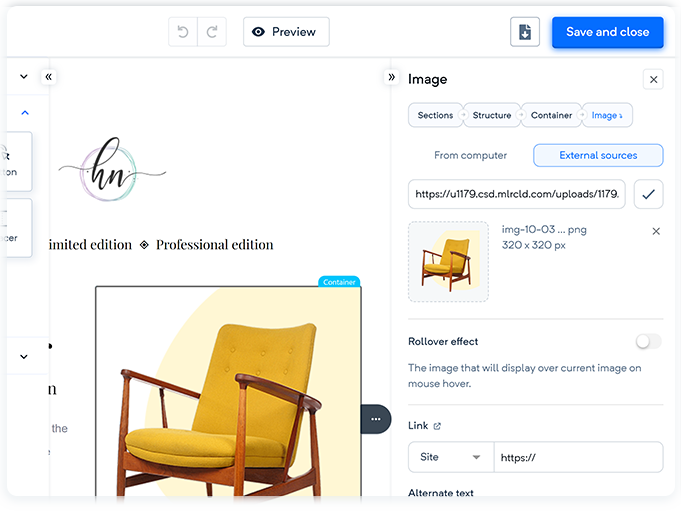
You can retrieve an image (PNG, JPG, or GIF) from the external source with a recommended size up to 3 MB or 4000 X 4000 px. To retrieve, select the option “external sources” and paste the external URL in the field.
Creating a Table
Tables can help you organize volumes of information in a simplified manner. Our platform lets you add a table and customize it according to your needs.
To add a table, follow the following simple steps:-
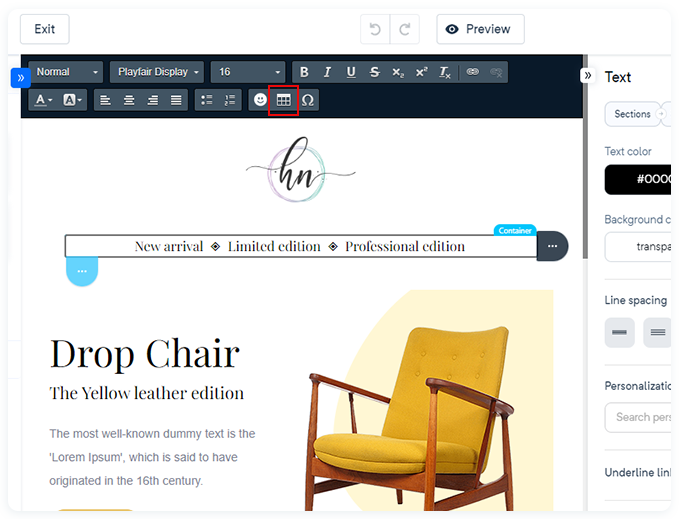
Step 1: Select the text where you want to add the table.
Step 2: Choose the table option from the text editor menu appearing on the top.
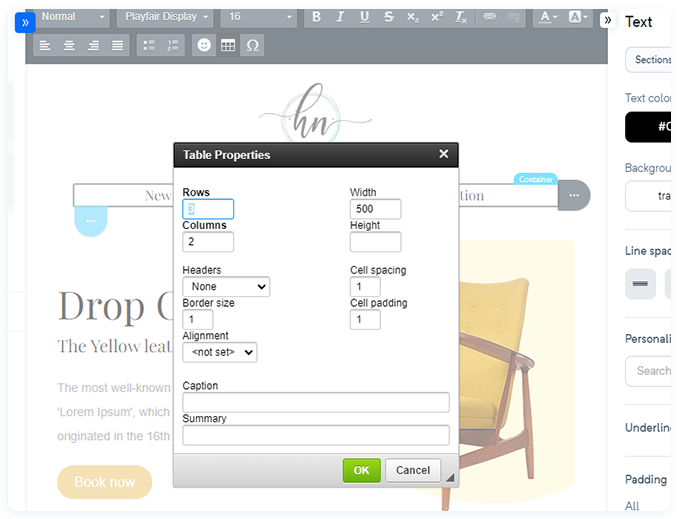
Step 3: This will open the table properties menu, from where you can manage the number of rows, columns, table width, height, cell spacing, cell padding (outer space inside the cell), table alignment (center, left, or right). You can also add a caption or summary for the table, which is as shown below:-
With our personalized tags, you will never have to worry about entering your customer’s basic details like the first name, middle name, city, country, and others into the email templates.
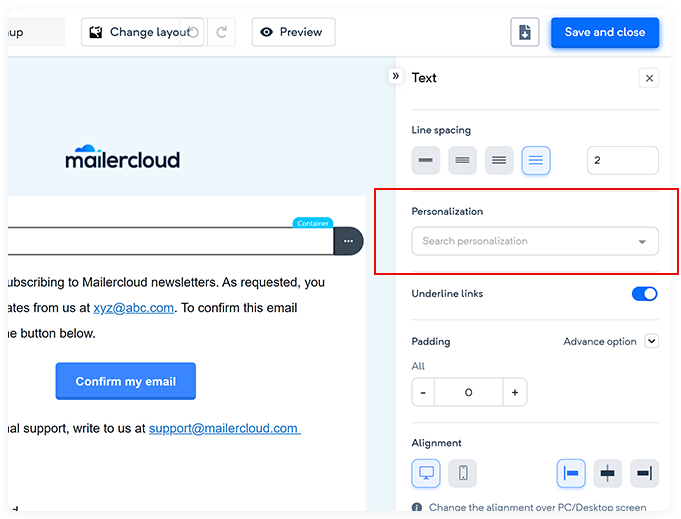
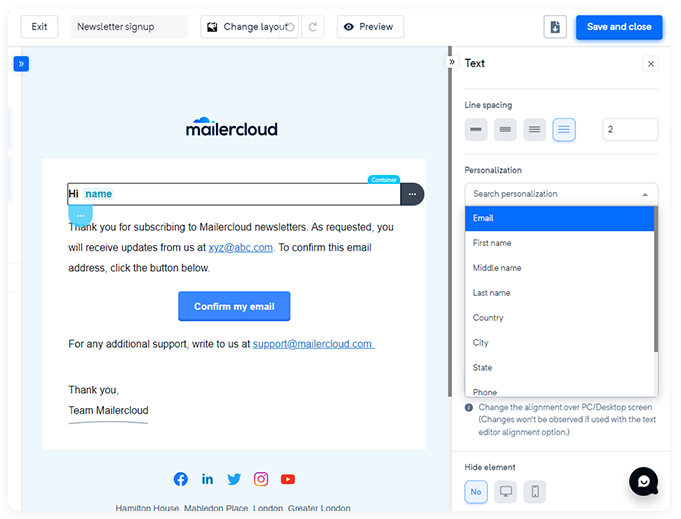
You can simply select personalized tags using the following simple steps:-
Step 1- Select the container where you want to add personalized tags.
Step 2- Go to the personalization option appearing under the text menu on the right-hand side.
Step 3- Select the personalized text of your choice, like first name, city, country, or any other.
Step 4- This will automatically replace these tags with the relevant fields, as per the details mentioned by you for the targeted contact.
Note:- For achieving effective personalization you should update your customer's contact list with all the relevant fields.