Email campaigns are one of the most effective ways to engage with your audience, share updates, promote your services, and build lasting relationships. Mailercloud’s intuitive campaign builder lets you launch beautiful and high-performing campaigns in just a few steps.
Whether you're new or experienced, this guide walks you through the entire process of setting up and sending your first campaign.
Log in to your Mailercloud account.
From the dashboard, click on the Create Campaign button located in the top-right corner.
Here’s where you define the basics of your campaign:
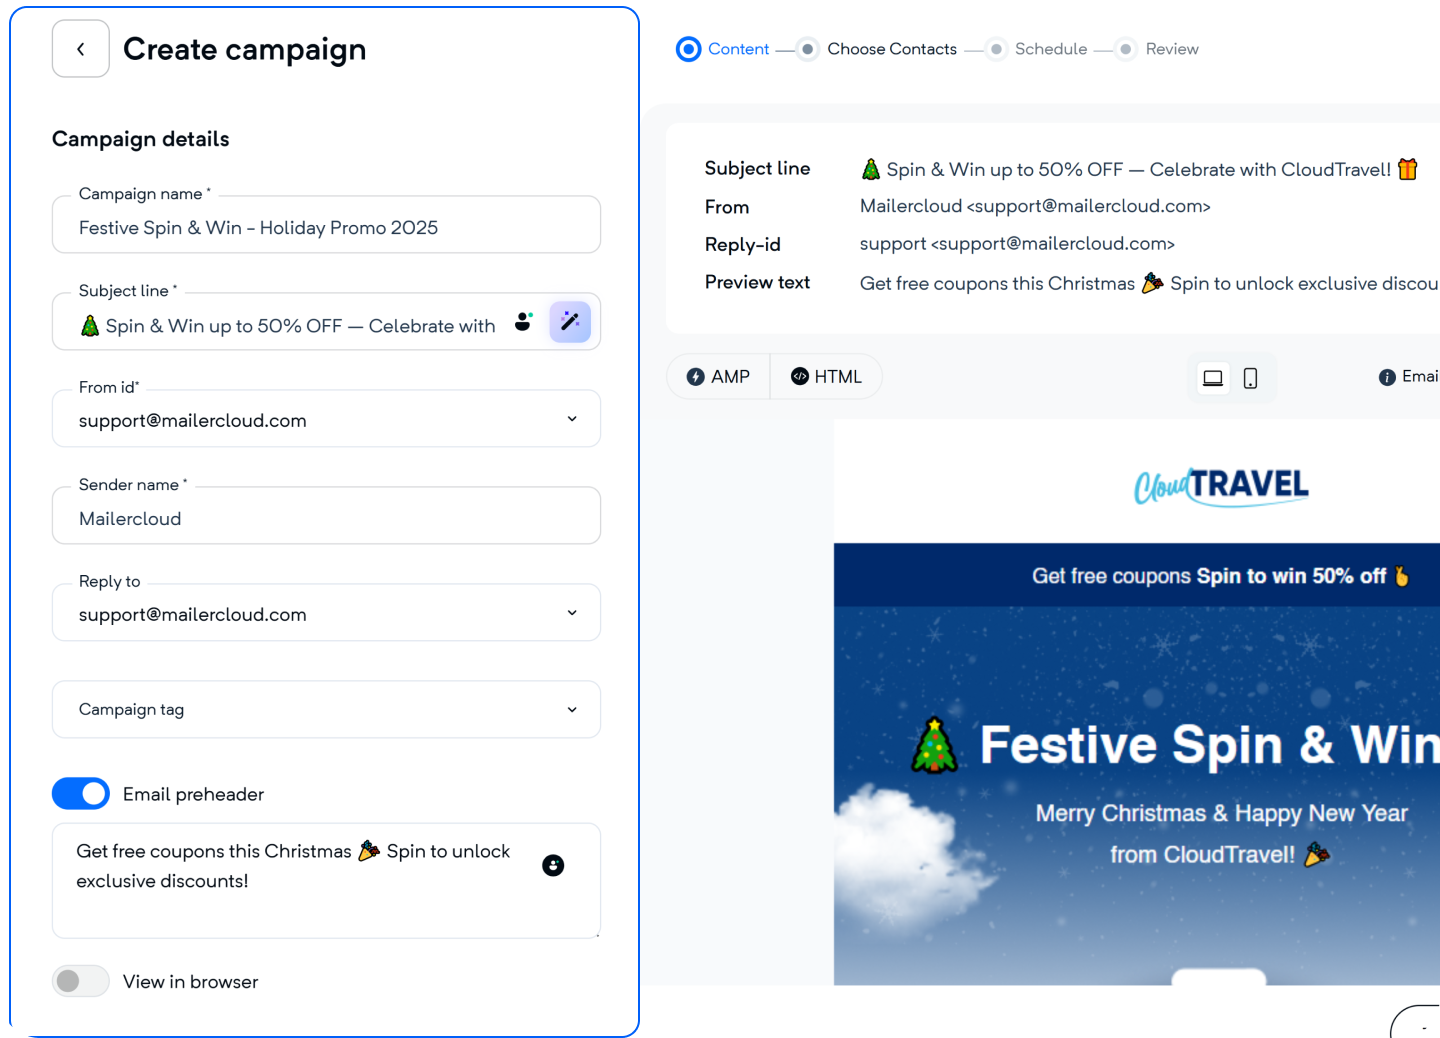
Campaign Name – Enter a name that helps you easily identify the campaign later.
Subject Line – Write a catchy and relevant subject line, or use the AI-Powered Subject Line Generator to get optimized suggestions.
From ID – Choose the verified email address from which your email will be sent.
Sender Name – Enter the name that will appear in your recipients’ inbox.
Reply-To Address – (Optional) Add an address where replies should be directed.
Campaign Tag – Organize and categorize your campaigns with custom tags.
Email Preheader – Add a short preview message that appears next to the subject line in inboxes for better open rates.
Once everything is filled in, click Next to proceed to email design.
Mailercloud offers multiple ways to design your campaign based on your preferences and needs:
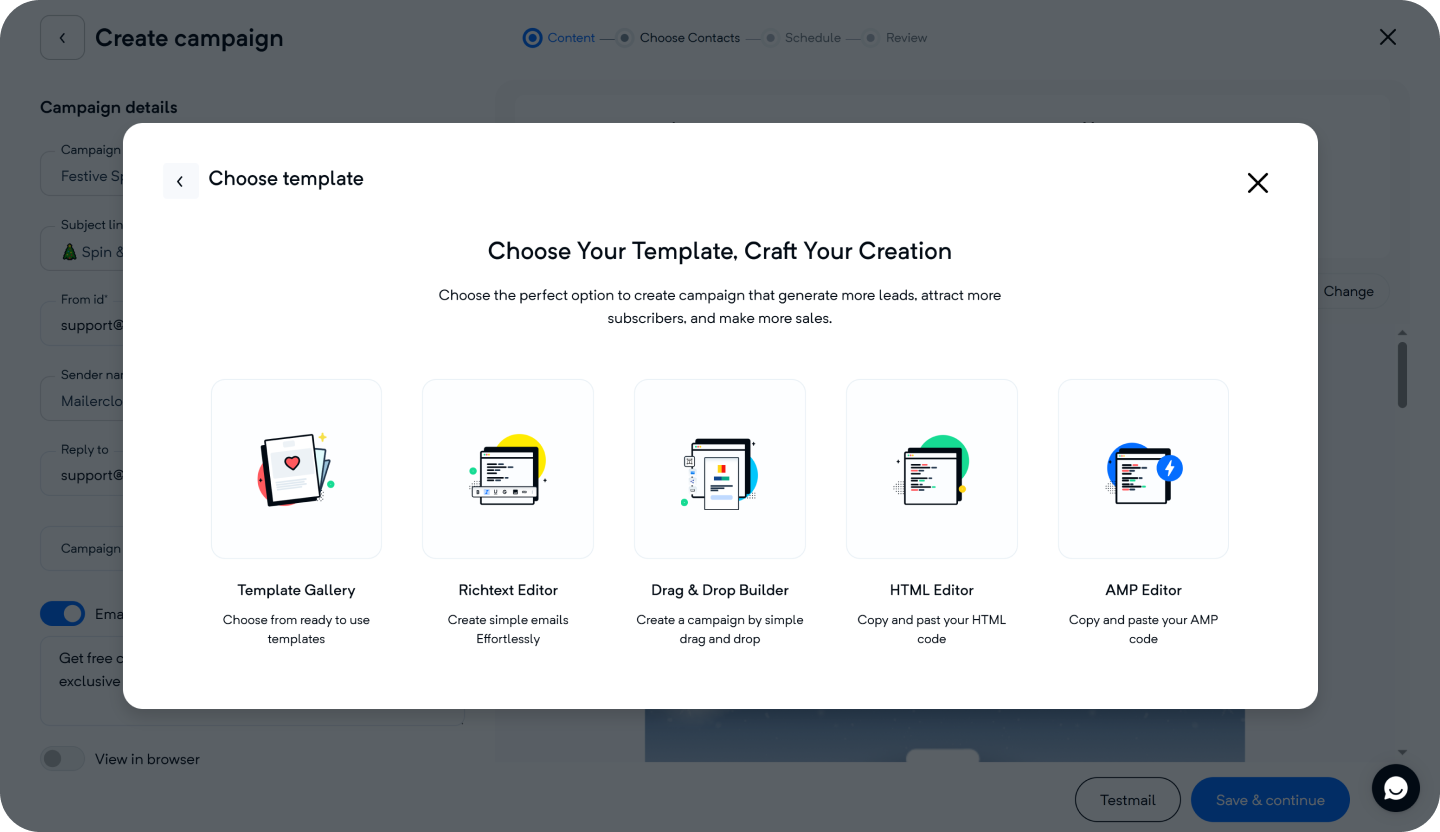
Choose a Template from the Gallery – Browse Mailercloud’s Template Gallery and select a professionally designed template suited to your campaign.
Customize with the Drag-and-Drop Editor – Easily add and arrange text, images, buttons, and layout elements to create a visually appealing email.
Use the Rich Text Editor – For simpler emails, format content with basic styling, links, and images using the Rich Text Editor.
Code with the HTML Editor – For full design control, paste your custom HTML and preview across devices.
Create Interactive AMP Emails – Use the AMP Editor to add dynamic elements like carousels, real-time content, and forms within your emails.
Choose the method that best fits your campaign, then move on to contact selection.
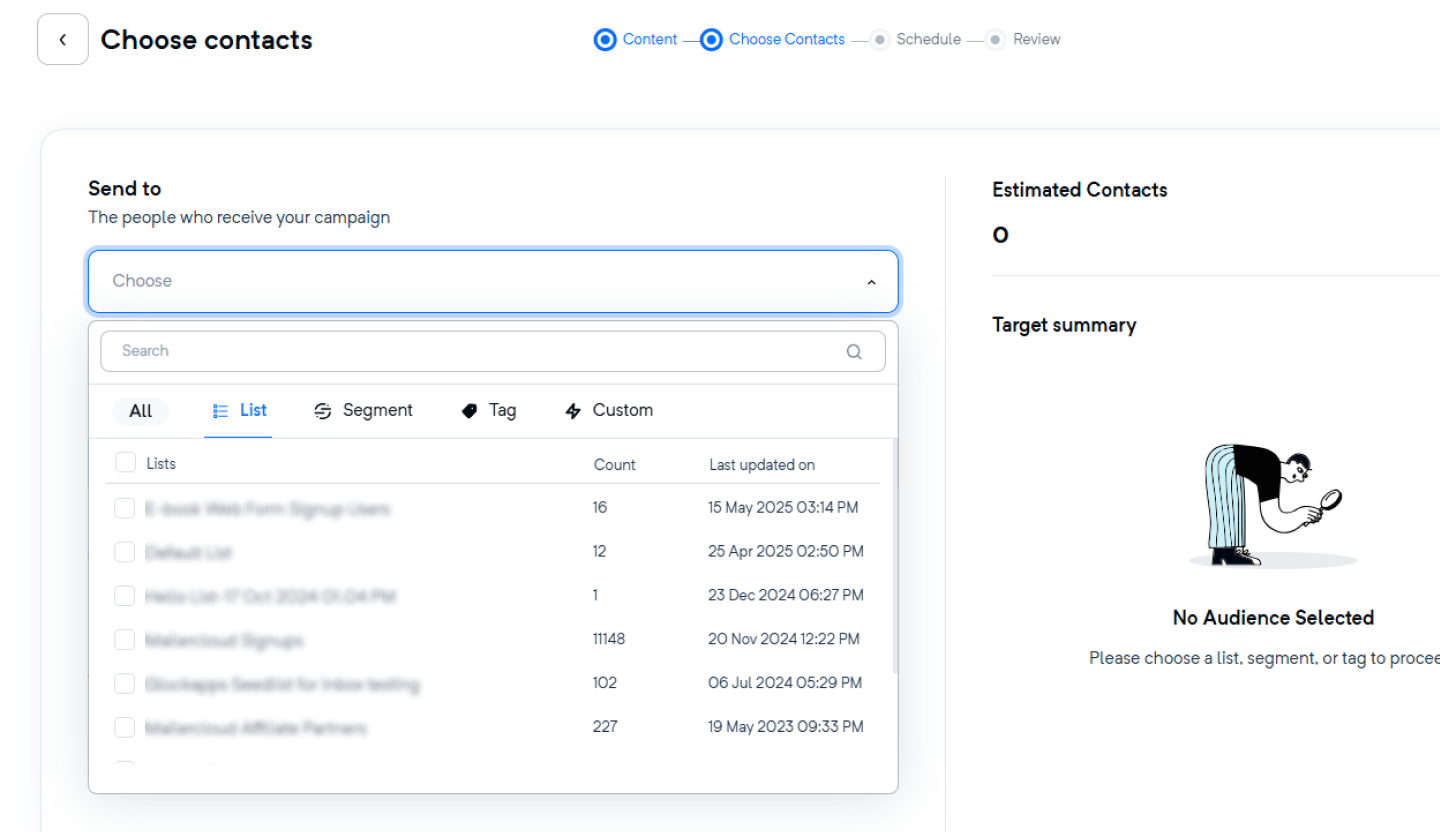
Targeting the right audience ensures your email reaches the people who matter most. In Mailercloud, you can:
Add up to 150 contact lists, 150 tags, and 20 segments to define your recipients.
Use up to 5 custom conditions (e.g., based on location, engagement, or behavior) to further narrow your list.
Exclude up to 150 lists, 150 tags, and 20 segments, and apply up to 5 exclusion conditions to avoid sending to the wrong people.
View the Estimated Contacts count on the right, which updates in real-time based on your selections.
Once your audience is selected, click Save & Continue.
To avoid overwhelming your subscribers:

Enable "Avoid sending emails to contacts too frequently" within the audience selection step.
Adjust the time interval for frequency capping under Account Settings > Preferences to control how often a contact can receive your emails.
Want to test the waters or do a staggered send?
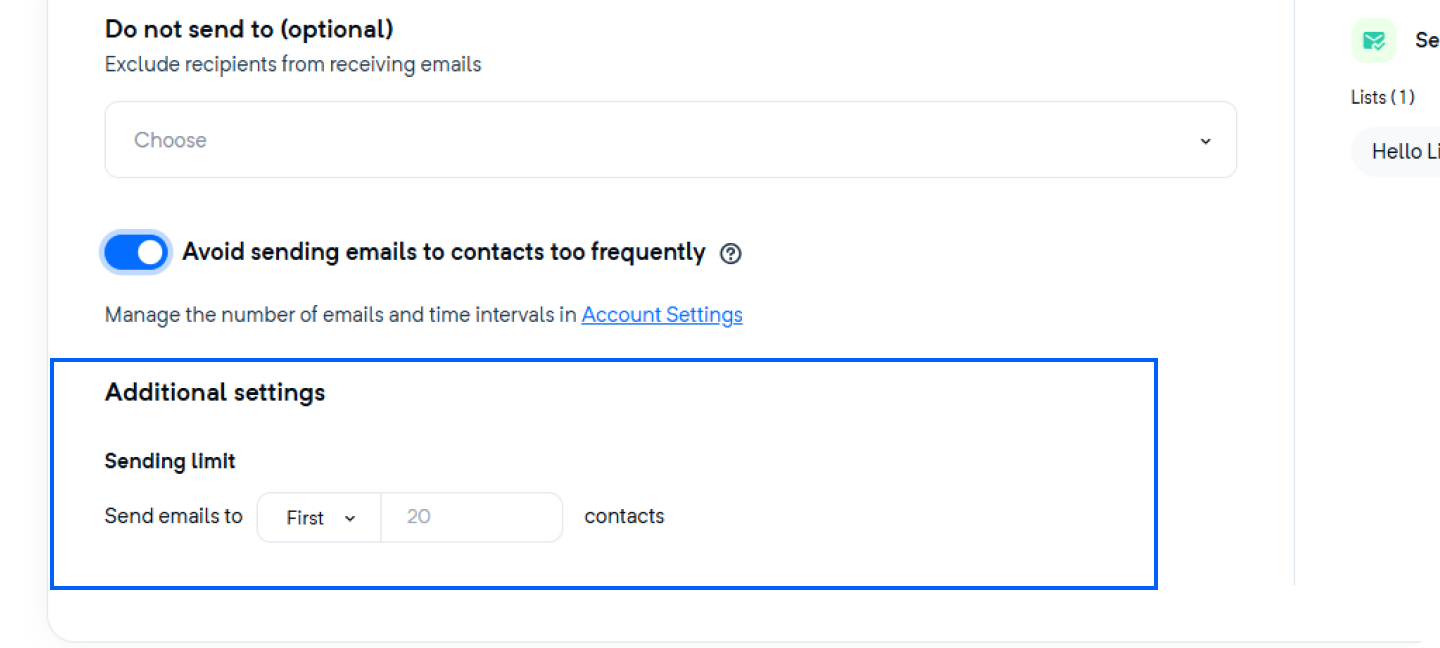
Under Additional Settings, choose to send to the first or last selected contacts.
Set a maximum number of recipients to limit how many people receive the campaign—ideal for batch sending or A/B testing.
You have full flexibility on scheduling:
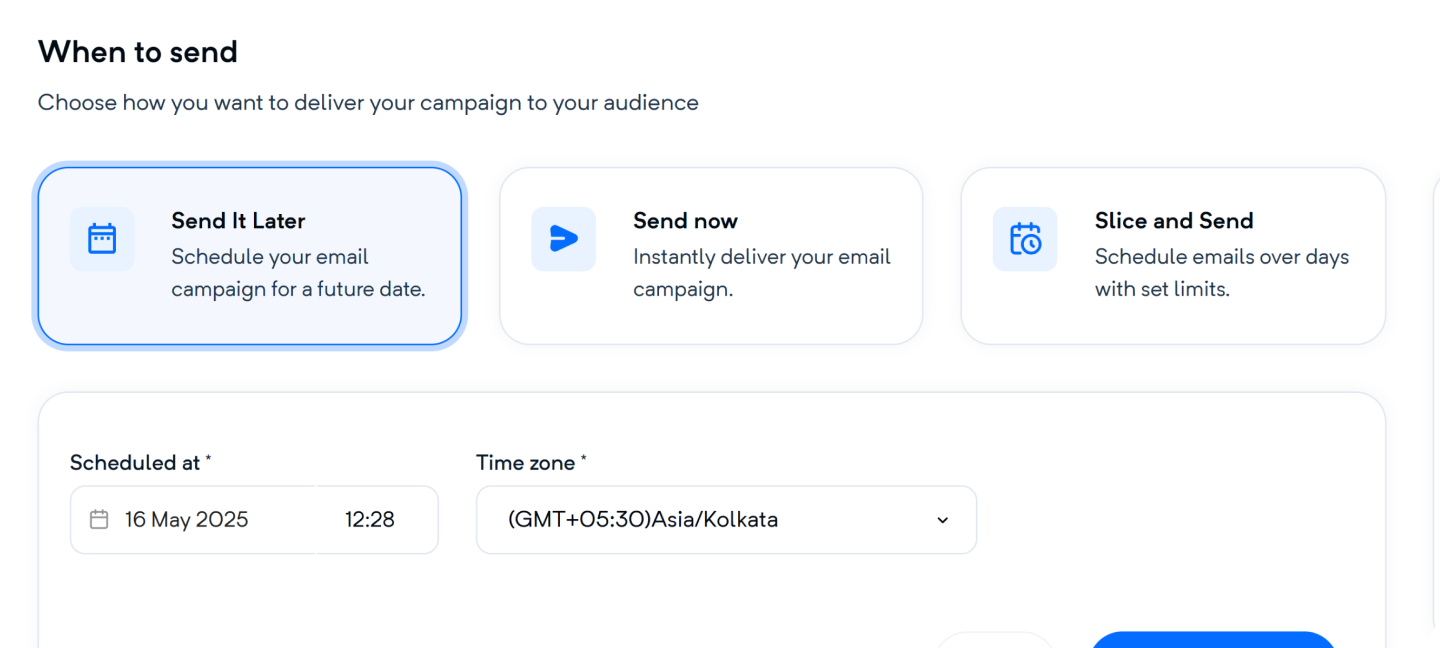
Send Later – Choose a specific date and time to schedule your email.
Send Now – Send your campaign immediately.
Slice and Send – Distribute emails across up to 30 different time slots within the same day for optimal engagement.
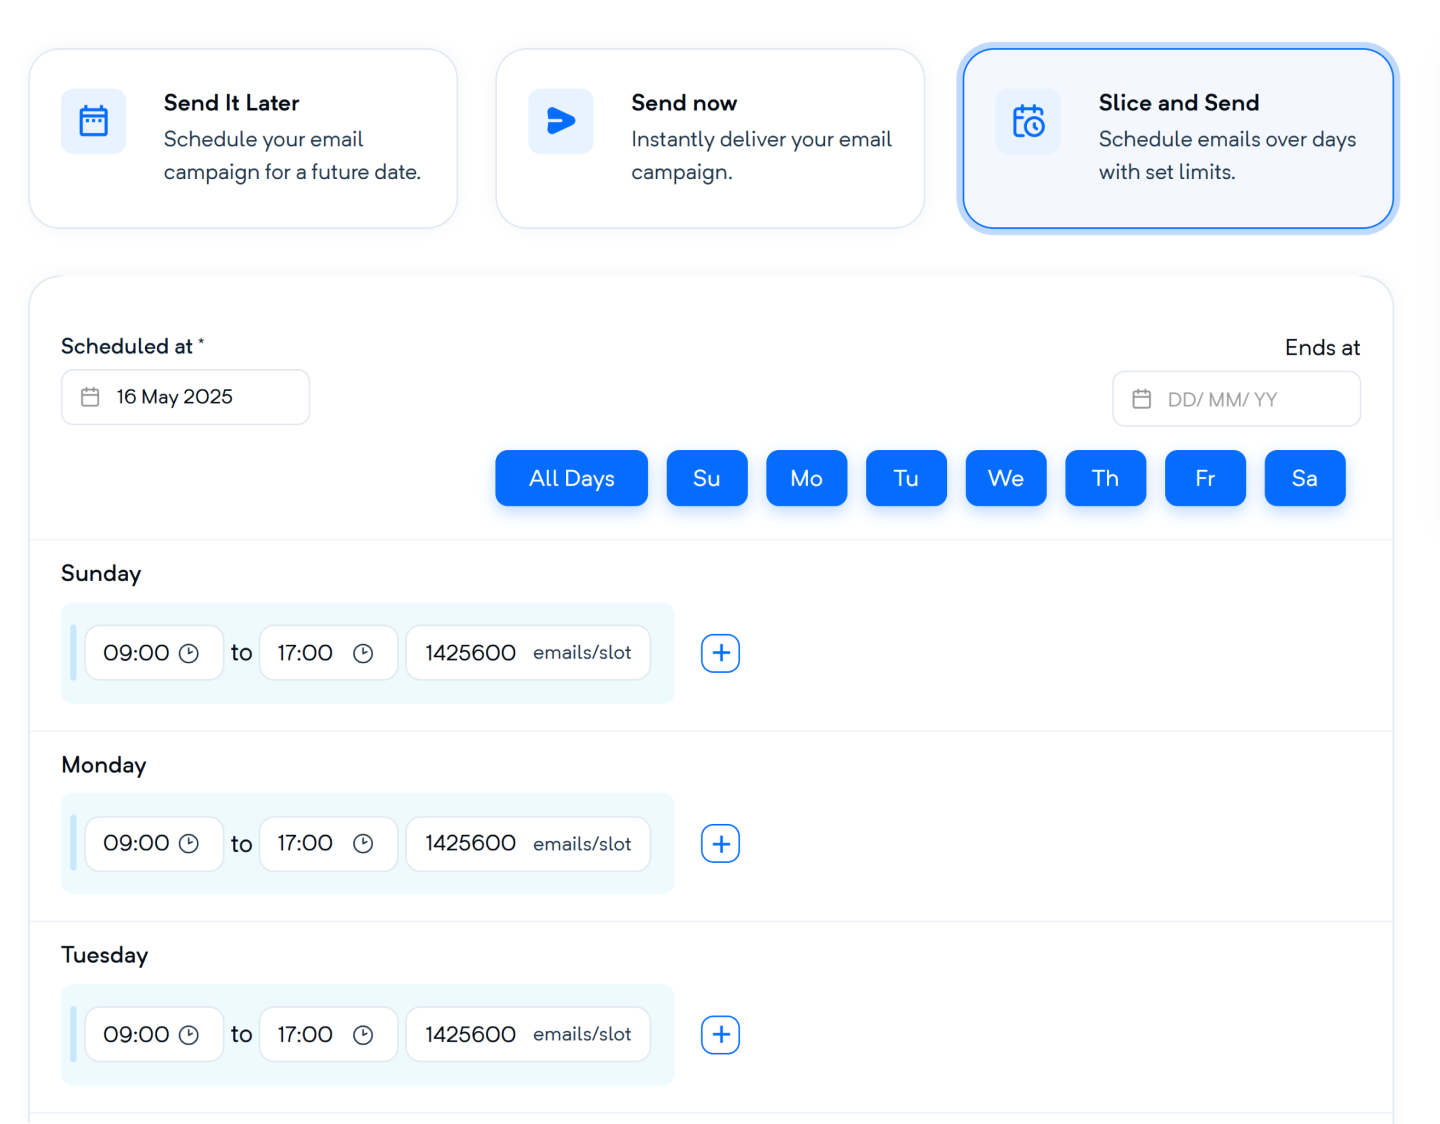
Choose the number of sending slots (up to 30).
Set preferred sending times based on past user activity.
Great for reducing inbox overload and improving deliverability.
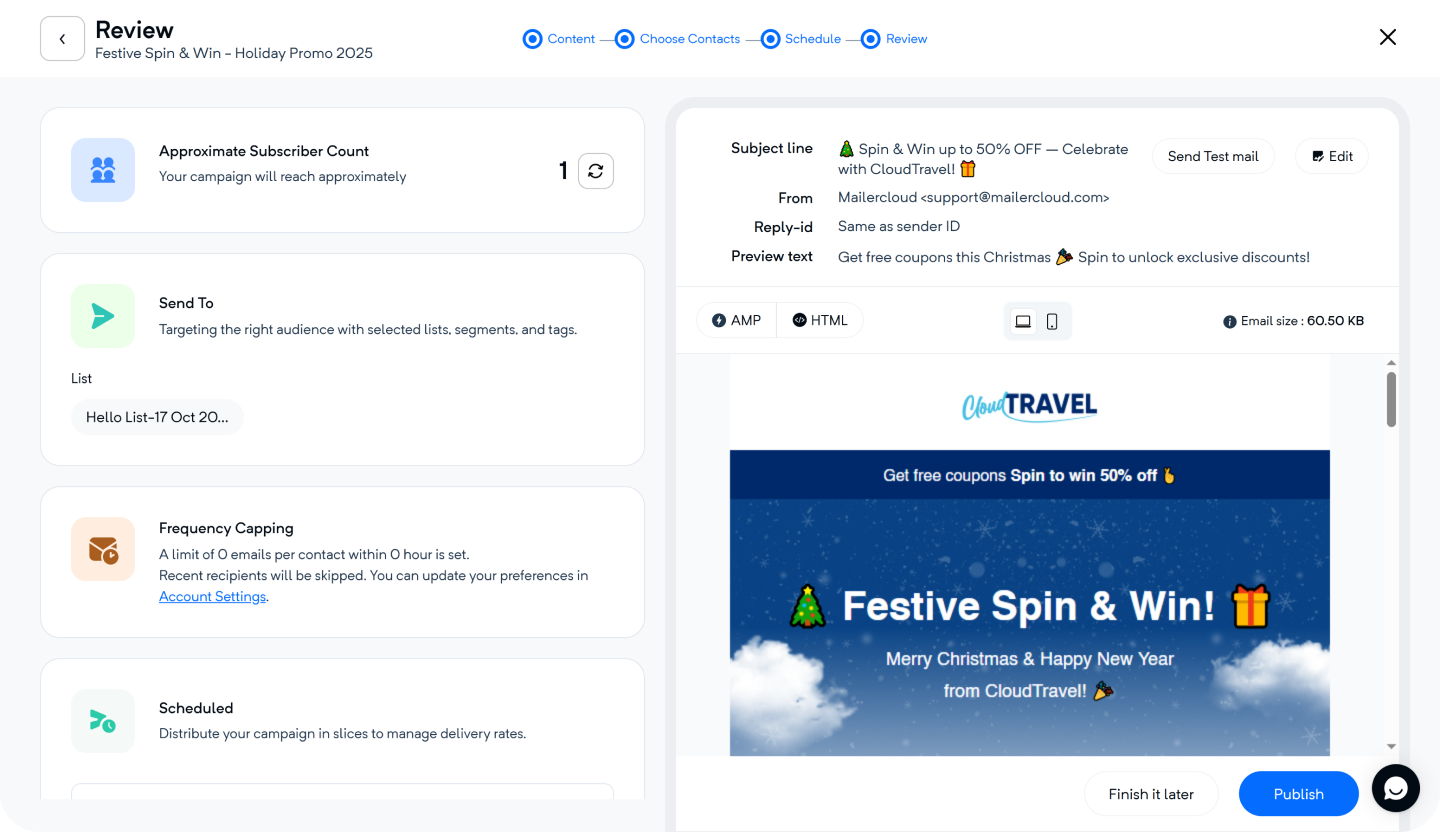
Before you launch:
Double-check all your campaign details—subject line, sender info, and content.
Confirm your audience selection and review the estimated contact count.
Revisit your sending schedule to ensure it's set up correctly.
If everything looks perfect, click Publish Now to send your campaign!
🎯 Monitor your campaign performance in the analytics dashboard.
📊 Track key metrics like open rates, click rates, and bounces.
🔁 Use insights to refine your strategy for future campaigns.
If you have questions or need assistance at any point, don’t hesitate to reach out to our support team—we’re here to help.
Happy emailing! 🚀