Mailercloud’s webform builder is an intuitive, real-time and easy-to-use drag and drop form builder. It doesn’t require any technical skills to create attractive forms. Creation and embedding webforms into your website and data collection can be done in a matter of a few seconds.
We let you make leads from anonymous websites visitors. Everyone who interacts with the form will be automatically converted into your Mailercloud contacts.
Build- Create unlimited forms having a multitude of layouts and designs with our drag and drop webform builder.
Publish- Customise and insert your form directly on your website or blog.
Get notified- Get real-time notifications as soon as a user fills your form. Simply, enter all the email Ids that are to be notified.
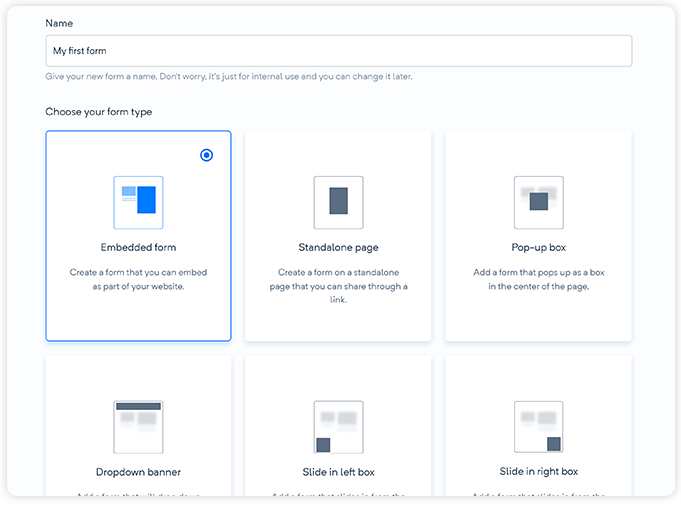
After logging in to the Mailercloud account, you can select Forms by hovering the cursor over the left side of your Dashboard. On the page that appears, enter the Name of the form. Select a form type that will suit your business needs, industry and audience. To get a better glimpse of how to create webforms with Mailercloud, refer to the following video tutorial:-
Embedded forms - Create forms that you can embed in your websites.
Standalone form page - Make standalone form pages directed by links you can share.
Pop-up forms - Create forms that pop up in the center of your page.
Dropdown banner - Make a form that looks like banners hanging from the top of your page.
Slide-in right box - Build forms that slide into your page from the right.
Slide-in left box - Design forms that slide into your page from the left.
Soon after choosing your form type, you can move on to select from one of the form templates. This makes your form-building job, easier.
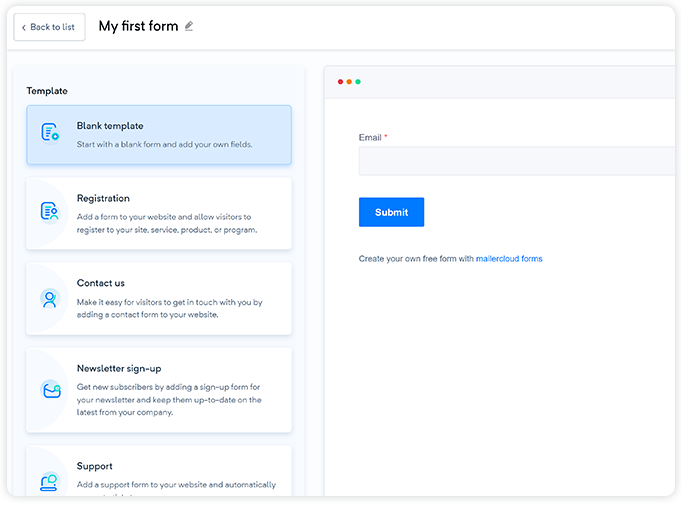
Mailercloud lets you choose from a variety of form templates if you are opting for an embedded form or a stand-alone page.
Blank template: Start from scratch with a blank form and add your own fields.
Registration form: Make a form that lets your visitors register to your site, service, product, or program.
Contact us: Add a contact form to your website to help your customers get in touch with you.
Newsletter sign-up: Add a sign-up form for your newsletter and keep them up-to-date on the latest from your company.
Support: Add a support form to your website and automatically generate tickets.
eBook download: Adding a form to your website to let visitors download eBooks and other resources.
Event registration: If you are conducting workshops, conferences, webinars, and events, you can add an event registration form to your website.
Hit Continue just after selecting a form template. Now, you are being directed to our real-time drag and drop web form editor. Mailercloud lets you edit your form blocks, form content, form style and we have a lot of other options.
Form
Style
Options
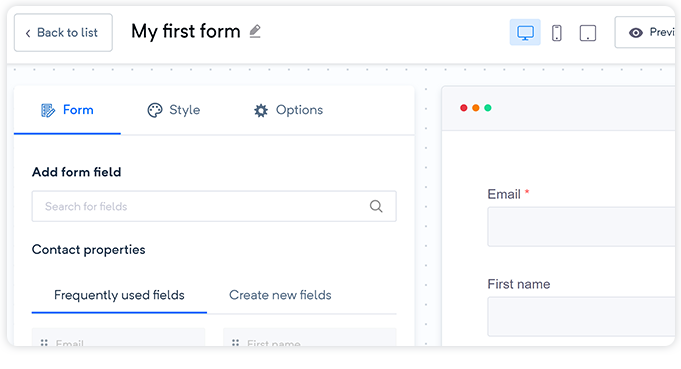
If you are searching for a particular form field, enter the name of your form field into Add a form field option. Mailercloud automatically searches for the required field in our frequently used fields and Contact information fields.
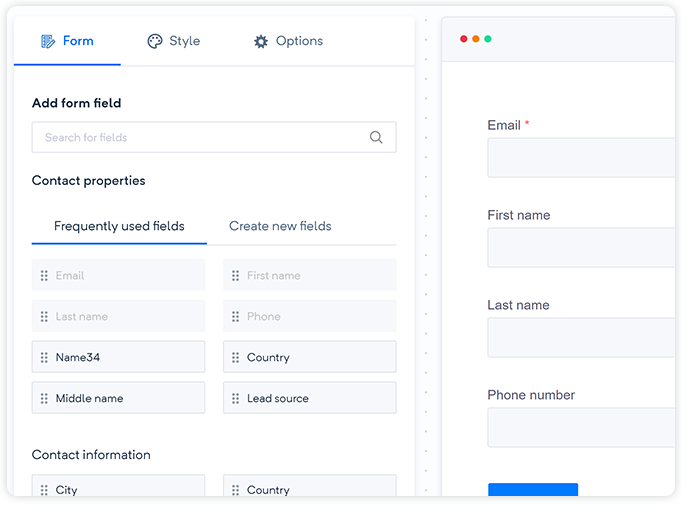
Terms and conditions field: Mailercloud lets you add the terms and conditions field to the end of your form.
reCAPTCHA confirmation: We help you ensure that genuine people fill your form. This can be done by adding reCAPTCHA confirmation to the end of your form.
You can create your own unique form field by clicking on Create new fields. Select the type of field you want to add from the list:
Single-line-text
Number
Single checkbox
Multiple-line-text
Date picker
Paragraph(Rich Text)
Drop Down
Radio button
Header-text
Image
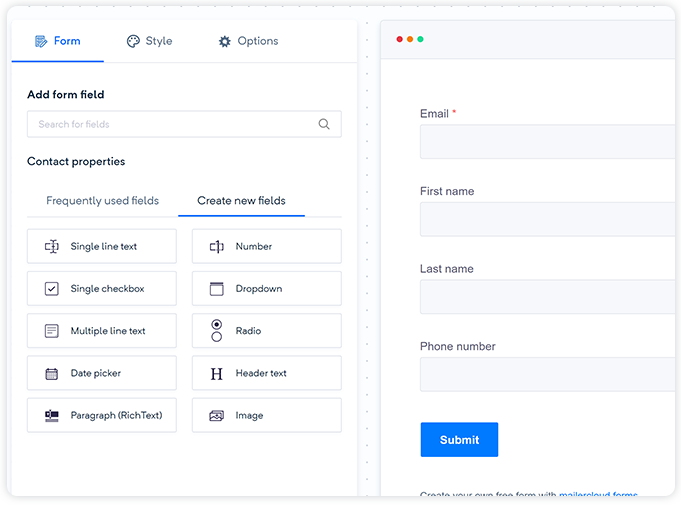
After you select any one option from the list you can enter the Label name and description. And click Create.
While you are clicking on a field the form, you can see
The Contact property name
The field type
The label
Placeholder text

You can edit both the label and the placeholder text.
You can edit the basic settings:
This is a required field: It informs the form user that it is mandatory to fill this field before submitting the form. Email Id will be a required field in every form by default. You can make any form field as required by updating the basic settings.
Make this field hidden: This is to track the website from which the form was filled, in case if we are embedding the link to multiple websites.
On Mailercloud, only 3 forms can be rendered at a time on a single IP. If you try to load more than 3 forms in 1 second, the API will give you a ‘too many requests’ error. In this case, only the first 3 forms will load and the rest would not.
Styles - Determines how your form fields and submit field should look like. Depending on the box type, there are four styles.

Adjust the Form width
Choose the font family
Pick a Label color
Select the Size

Select the Colour and Size of your terms and conditions field.
Choose a Button color
Pick a font size
Select a Font color
Decide the Alignment

Decide what should happen after a user submits your form:
Confirmation thank you page
Mailercloud lets you express your gratitude towards all your customers for patiently filling up details. You can edit our preview text.

Redirect to another page
If you are sorting to redirect the users to another page, enter the URL into the box.

Add contacts to a list
Select the Mailercloud contact list to which you want the contact information of the form users should be stored. By default, our webform builder creates a contact list with the name of the form and the date of creation.

Duplicate web form submissions
While creating a webform, you can allow or restrict your audience to make duplicate webform submissions. In case, you want your website visitors/audience to make duplicate submissions, you can uncheck the "Prevent duplicate submissions" option under the "Options" menu.

On the other hand, if you do not want your audience to make any duplicate submissions. Then, you can checkmark the "Prevent duplicate submissions" option under the "Options" menu. Further, you can edit the display message in the editor, which says "Email already exists" as per your requirement. This message will be displayed, whenever someone tries to make a duplicate webform submission.

Follow up option
Mailercloud ensures to give you real-time email notifications as soon as one of your audience responds to your form. Add your email address and the email addresses of people you need to share the form notifications with.
You can now Publish your web form.
You can integrate your webform into your website in two different ways:
Copying the link we generate: Mailercloud generates a link to your web form, that you can share with all your contacts.

Embedding the code in your website: Mailercloud will generate a code for your form, which you can copy and paste into the HTML code on your website.

In the web form list, you can see the Name, Type, Status, and Submissions of each web form.
You can filter the webforms by Name, Date Range, and Status.

The status of your web form can be:
Active
Inactive
Draft
The following actions can be performed on your webform:-

Edit - You can make all the necessary edits to your web forms even after publishing them.
View - You can view the webforms which are in the active state.
Duplicate - You can duplicate any of the existing forms by selecting the Duplicate option.
Share - Let's you share your form. You can access the link to share and the HTML code to embed the form to your website by clicking on the share option.
Deactivate/Activate - You can deactivate an active form by clicking on deactivate. If you want to activate a form that was previously deactivated, click activate
Delete - For permanently deleting your Mailercloud webform.
Observe the real-time report of your Mailercloud webforms by selecting Forms from the dropdown list of Report section in the dashboard.

In the forms report section you can see the following:
Name of the webform.
Type of the webform
The status of your webform, if it is the draft, active or inactive.
Number of webform views
The number of webform submissions.
Do I need to have any technical skills for creating webforms with Mailercloud?
No, our webform builder is easy-to-use, quick and responsive. You can create attractive webforms and embed them on your website with a click.
Can I track the performance of my webforms?
You can check the real-time performance of your webforms by visiting the "Report" section on your dashboard and selecting "Forms" from the drop-down.
Can I prevent duplicate webform submissions?
Yes, you can prevent duplicate webform submissions. All you need to do is checkmark the "Prevent duplicate submissions" option under the "Options" menu of the webform creator. Further, you can edit the display message in the editor, which says "Email already exists" as per your requirement. This message will be displayed, whenever someone tries to make a duplicate webform submission.
Can I allow duplicate webform submissions?
Yes, you can allow duplicate webform submissions. All you need to do is uncheck the "Prevent duplicate submissions" option under the "Options" menu of the webform creator.