Follow these steps to add actions to your email automation flow:
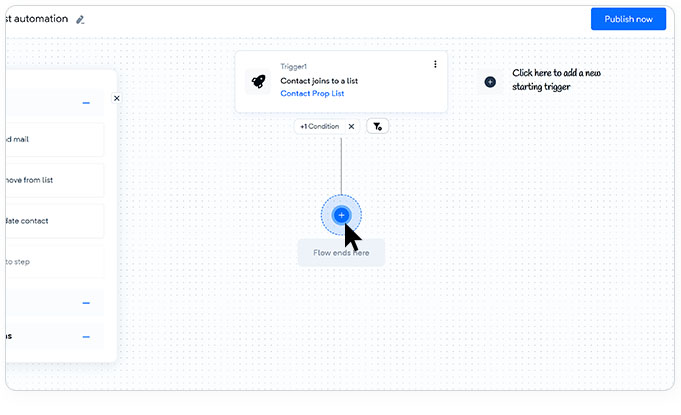
Locate the "+" sign, as indicated in the image below, and click on it to initiate the addition of actions:
After clicking the "+" sign, a menu bar will appear on the left side of the screen, as shown in the image below:
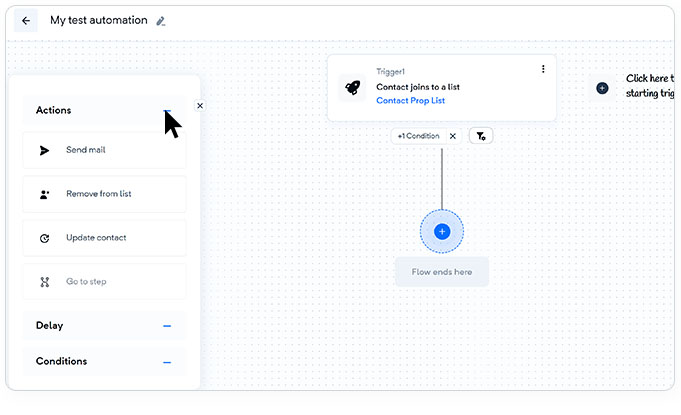
From the menu bar, you can choose the desired option from the available actions, delays, and conditions.
Automation actions let you define what should happen to your contacts at each stage of the workflow. These actions help you deliver targeted experiences, manage data, and control how contacts move through your automation journey.
Send a specific email to contacts at a defined step in the flow.
Choose from existing templates or create a new one.
Useful for welcome sequences, promotional emails, onboarding messages, and more.
Automatically add the contact to one or more selected lists during automation.
Great for organizing contacts based on engagement, preferences, or behavior.
Remove the contact from a selected list while keeping them active in your system.
Helps with transitioning contacts across segments without deleting their data.
Permanently removes the contact from your Mailercloud account.
Best used for contacts who unsubscribed, bounced, or should no longer be stored.
Modify any of the contact’s properties directly within the automation flow.
Update tags, names, status, or any custom field.
Supports dynamic content and future segmentation.
Redirect contacts to a specific step in the workflow based on conditions or behavior.
Allows you to build flexible, non-linear automation journeys.
These actions enable you to build precise, dynamic, and personalized automation workflows tailored to your marketing and communication goals.
If you have any further questions or need assistance, please don't hesitate to reach out to our support team.